
How To Record Electric Guitar At Home: Microphone Techniques
Analog vs Digital Recording: How to Record on PC and MacNowadays, pretty much everything is recorded digitally. Mostly because of the convenience as well as the fact that it requires a lot less hardware in comparison to traditional analog set-ups. In my opinion, the sound quality is not affected if you decide to record digitally. Just make sure all your recording equipment is up to par and you should be good to go. DAW (Digital Audio Workstation)I should point out that if you are going to be recording electric guitars digitally on a computer, then you will need a DAW (Digital Audio Workstation). This is the software that allows you to capture and mix your recordings. Some of the most popular and best DAW for recording guitar include:
Audio InterfaceIn order to take an analog signal and convert it into a digital signal, you will need an Audio Interface. If you are just going to be recording one thing at a time, then I recommend an interface with a few channels. If you are going to be recording many inputs at a given time, then upgrading to a unit with more inputs makes sense. It is very important to note that you will not be able to record your electric guitar on a PC or Mac without an Audio Interface. Everyone from the bedroom recorder to the biggest studios in the world has an audio interface. If you're looking for the best one, my choice is always the Scarlett. Amp Modelling vs Miking vs ProfilingAmp modeling effects and units such as The line 6 Helix, Boss GT series of multi-effects or Native Instruments Guitar Rig software can offer a quick and easy way to record an electric guitar with decent tone and offer a range of amp tones to choose from. More recently, the Kemper profiler has caused quite a raquet in the recording community. As this unit is capable of producing an almost life-like sound of literally any amp you can think of. However many players are more comfortable with a real amplifier. And, will give their best performance when using one. There is nothing quite like the visceral pleasure of playing through a loud valve amplifier.
For the purposes of this tutorial, I am going to focus on how to record electric guitar at home using a microphone. Simply because, the amp models and simulators are pretty self-explanatory and once plugged in, require little further instruction. Whereas with microphone techniques, there are different techniques one can employ to achieve different sounds etc. Also, recording guitar amps are the most organic sounding in my opinion. Best Microphone For Recording Electric GuitarA dynamic mic such as a Shure SM57 or a Sennheiser MD421 is very often used to record electric guitar at home and in the studio. The reason that dynamic microphones are preferred over condenser mics is that the dynamics can handle the volume levels and have enough frequency range to cope with the limited response of an electric guitar amp. Below are some of my best microphones for recording electric guitar: a) Shure Sm57
As far as microphones go, this is one of those legendary guitar amp mics that tick all the boxes. Furthermore, they've been used to mic up a guitar amp and cabs both for live purposes as well as in the studio, ever since their inception decades ago. b) Sennheiser e609 - Best microphone For Recording Guitar Amps
I'm in love with this microphone. Purley because it was designed for the sole purpose of recording guitar amps and cabinets. Having said that, I much prefer this mic for live recording instead of studio recording. c) Sennheiser MD421
For me, this Sennheiser MD421 is the best SM57 alternative out there. It is also, in my opinion, a better premium option. Simply because it is able to record a much larger range of frequencies which is just perfect for recording electric guitars. Firstly, Make Sure The Amp Sounds GoodThe single most important detail in getting great electric guitar sounds is that the sound coming out of the amp should be great. This is determined by the guitar, amp & speakers and the person playing it. It is much easier to get a good recorded sound if the guitar/amp setup is a good sounding one. And making sure that the guitar sounds good first, can save you a lot of time later. So make sure the guitar is free from buzzes and rattles, the strings are relatively new and the intonation is set properly. Also, make sure the amplifier is in a good state of repair. Valve amplifiers also need to be maintained, with new valves every few years. And more extensive overhauls every fifteen years or so. Any problems with noisy pots or jacks should be sorted out before you go into the studio. Electric Guitar Microphone TechniquesIt is important to remember the point made above: the amp and speakers are part of the instrument and should be treated as such. Open-backed guitar cabinets emit sound from both the front and the rear of the cabinet, and you must often capture both to reproduce the real sound of the amp. The key to getting a great guitar sound is to constantly experiment, trying lots of things until you get the sound that is most pleasing to your ears.
Usually a guitar amp is miked close up with the mic up against the grille of the amp the way you do on stage – this is the quickest way to capture a dry isolated sound that will It also pays to add in an ambient mic a short distance away from the amp and finally with a room mic a few meters away. This gives you a range of sounds to play with. In the smaller home studio or those with an unflattering room sound, you may want to omit using the room mic. If you are going to use a room mic, take time to find a spot in the room where the amp sounds good and a spot distant from the amp which sounds good. Use those sophisticated measuring instruments of yours (your ears) and walk around the room listening for “sweet spots” where the amp sounds good – you’ll know them when you find them. Try different mics, try moving them closer and farther, try different angles, try putting the amp in a corner, try putting the amp on a concrete floor, try it on a wood floor, try it on a floor with carpeting – basically just try everything you can think of! Close mic
The close mic gives a dry, punchy, detailed sound. Usually, a dynamic mic such as a Shure SM57 or a Sennheiser MD421 is used as the close mic as dynamics can handle the volume levels and have enough frequency range to cope with the limited response of an electric guitar. Set up the mic right against the amp’s grill cloth, pointing it straight at the amp will give a clearer, more detailed sound, but with more highs and a harsher edge. Angling the mic slightly will soften the tone at the expense of a little detail and highs, and moving the mic towards the edge of the speaker will result in a mellower sound, as will moving the mic away from the cloth slightly. Close Mic Multi Speaker Cabs and Mics
Close miking multi-speaker cabinets – Speakers vary a little, so if the amp has a multi-speaker guitar cabinet, listen to each to see which has the better sound and close mic that one. Usually, there is nothing to gain by miking more than one speaker, unless the cabinet has different speaker models which each contribute something different to the tone – then you should mic both. If both speakers on my amp are the same, then I like to take two different microphones and place them on each speaker. I do this using the close mic technique above. This gives me two different tonal characteristics from the same amp. Ambient mic
A mic placed a few inches to a few feet back can fill out the sound and create interesting tonalities. Just be careful of the delay (approximately 1ms per foot or 3ms per meter) which causes phasing – canceling certain frequencies when mixed with another mic, which can be pleasing or horrible, depending on the frequencies canceled. So experimenting with distances is very important. If you are recording to a DAW (Digital Audio Workstation), it is possible to sidestep any phasing issues while keeping the ambient mic’s tonality by dragging the recorded track into alignment with the other mic tracks. Room Mic
For the room mic, place a condenser mic anywhere from half a meter to two meters in front of the amp (at the same height as the amp) and point the mic at one of the speakers. The further the mic is from the amp, the more bass and less midrange it will have. More room sound will be picked up – making the sound bigger. If you have enough tracks on your recorder, print each mic to a separate track (if possible) to be able to decide the balance between them later, otherwise mix them to the desired balance when recording to a single track – just be careful not to add in too much room mic. Record A Simultaneous Dry Signal with DI Box
A very useful tip I picked up over my years of recording is to make use a separate but simultaneous dry signal. Essentially, whilst plugged into the guitar amp. I like to split my signal so that I have the guitar amp sound as well as a completely dry sound coming straight from a DI box. The dry signal lets me take a completely unaffected sound and allows to reprocess or re-amp the sound after recording, using my DAW. With the DI signal, I usually add effects and run it through different plugins and digital amplifiers for a variety of sounds afterward. This signal is almost never used as my main recorded guitar sound. But, it is an incredibly useful thing to have. Especially if you want to go back and rework certain parts without having to go through the whole microphone process again. ProcessingCompressionUse compression on the close mic. Set the compressor at a 3:1 ratio and adjust the threshold so that the compressor is usually working, but not squashing the signal too much. Note, this not the same as using a compressor pedal for guitar. Here, I'm referring to using compression on the microphone which is a completely separate entity. EqualizationThe Electric guitar is not a natural instrument, so the only EQ rule is: Get the sound you want! Adding 100Hz – 250Hz will give you more bottom, rolling off 300Hz – 500Hz will eliminate some of the nasal quality, adding a touch of 700Hz will create a throaty or woody sound, adding a pinch of 1K will give the guitar more edge, adding 3K will give the guitar more bite, and adding 5, 8, or 10K will make it brighter. Doubling Guitar PartsDoubling a rhythm guitar and panning the two tracks hard left and right can make the guitars sound huge. But consider what works best for the song. Is the rhythm guitar the featured instrument, or will there be several other guitars competing for space in the stereo spread? Sometimes less is more. If you do decide to double the guitar, think about altering the sound on the double track to give you more thickness. You can change guitars and keep the amp the same, or vice versa. Change pickup settings if using the same guitar on the second track. EQ the two tracks differently (scoop mids out from one and boost the bass and treble, and do the inverse for the second guitar). Make sure the performance is really tight though, matching the first track’s phrasing. Otherwise, you might end up with a cluttered mix that would be better off with only one track of guitar. MixingStart with the close mic – this should comprise the bulk of your guitar sound. If it sounds good as it is, stops and don’t add any room or ambient mic – just because you have the extra mic tracks, doesn’t mean you have to use them (but rather have them and not need them than need them and not have them). For a slightly more distant, but fuller sound, bring up the fader on the ambient or room mics. Slowly add those signals to the close sound. You’ll have the detail of the close mic, but with the fullness that comes with adding some “room” sound to it. You don’t need to mix the guitar much louder than the other instruments or with more distortion to make it sound big. It’s all about how well you record it, to begin with. If you’ve done that right you’ll be in great shape for the mix. The post How To Record Electric Guitar At Home: Microphone Techniques appeared first on Guitar Pick Zone. via Guitar Pick Zone http://guitarpickzone.com/how-to-record-electric-guitar-at-home/
0 Comments
Best Strap Locks For Electric, Acoustic and Bass Guitar
If you are learning to play guitar or take a special interest in playing it, then a guitar strap lock will definitely help you. Consider buying one of the best guitar strap locks to make sure that your guitar is safe and secured. It prevents the guitar to fall off while playing it. It is extremely beneficial for the musicians, be it the beginners or experts. If you are looking forward to buying a pair of strap locks, then here are some of the reviews of the best locks available in the market right now. This review will help you to choose the best according to your needs and preferences. After which, I will delve into answering some FAQ when it comes to this guitar accessory. How Do Guitar Strap Locks WorkThe term guitar 'strap lock’ is used for a special type of locking device which helps to secure the straps onto the guitar. This is used mainly to stop it from falling off onto the floor and cause severe damage to it. As much as the straps are important, the strap locks play a very crucial role in keeping the guitar straps attached to the guitar. There are various types of such locks available in the market with different colors and made up of different materials. How To Use Strap LocksThe main benefit of having a guitar strap lock is that it can protect your instrument from falling down. Also, if you take the guitar strap on and off all the time, then installing the strap locks is a good idea. Generally, when you repeatedly take the strap on and off, the end tends to lose and wear off. In this case, the strap locks cab be highly beneficial. You can pop the straps off and on any time without damaging it at all. Benefits of Strap locks:Stap locks help keep the strap attached to your guitar. Thus, eliminating the need to worry about dropping your guitar. You see, whether you're standing up or sitting down playing guitar, you'll want your strap to be as secure as possible. The last thing you want to have to worry about is dropping your guitar because of a weak guitar strap. What Are The Best Guitar Strap Locks?Below are 9 of, what I think to be, the best guitar strap locks for bass, electric and acoustic guitar. I'll dive a little deeper into the specific instruments after the review. But for the most part, these will work on pretty much all of your guitar straps no matter what instrument you're playing #1: Schaller 14010401 Security Strap Lock
Schaller is a quite prominent name in the strap lock industry for many years now. It is widely popular for producing some of the best strap locking systems for all electric, bass and acoustic guitars. This is one of them with a fine and sleek look. It is very sturdy in nature and completely indestructible even under some of the toughest conditions on the stage. So, this Schaller product is an ideal locking system for the professional guitarists who are looking for something really sturdy providing immense security. The extra-long screws provide a great grip of the strap to the guitar. The black chrome finish gives a much premium look to your guitar. Check The Price Of The Schaller Locks Here #2: Guitar Savers Premium Strap Locks
This is one of the bestselling locks for guitar straps. It can work great with both of the OEM strap buttons. The best part is that it can be installed very easily without any hassle. It can easily slip over the already existing buttons of the guitar strap. You do not have to remove or replace them. It can do an excellent job by locking the strap within seconds. There is no mechanical thing involved and hence there is no chance to break or wear away. It is available in a convenient six-pack which is quite handy when you need it for an emergency. The overall lock is very simple and low profile which great for people with a budget constraint. But it is extremely effective and great for locking your acoustic, bass or electric guitar. There is no need for screwing or drilling. You will be able to use it anywhere and everywhere. Check The Price Of The Guitar Savers Locks Here #3: Schaller S Locks for Guitar Straps
Here is yet another Schaller lock. This company definitely dominates the game when it comes to making the best of the strap locks. They also come in a choice of some amazing color options like – nickel, gold, and chrome. All the colors look super premium and classy for your guitars. This is a revolutionized locking system for the guitar which comes with a very unique design and functionality. All you have to do is simply screw it on to your guitar and straps to secure them completely. You can now jump or do anything freely and confidently. You do not have to worry about the guitar or its lock. It will remain completely safe and secured with this lock. Check The Price Of The Schaller S Locks Here #4: Dunlop Guitar Strap lock Dual SLS1031N
If you are looking for a more safe and secure mechanical strap lock for your bass guitar then this is the one. It is a 360-degree groove and ball design that allows you to rotate without catching it. This is best for the on-stage performers who need an easy to install lock. It is made up of good quality steel which can last for a long time. You can use the same strap with this lock for several other guitars because the button is interchangeable in nature. It can hold a pressure up to 800 lbs. which is pretty amazing. This is really great for the ones who are professional singers and perform often on the stage. Check The Price Of The Dunlop Strap Locks Here #5: Fender Guitar Strap lock with Button
This is a guitar strap security system by the brand Fender. Though it is not that easy to install as it comes with screwing and drilling, this provides immense security. This lock is made up of a premium quality material which can last for several years. It is ideal for professionals who use one guitar at a time. This locking system is great and it gives you complete confidence to you. No matter, if you are jumping or doing anything, this lock is completely secure. Check The Price Of The Fender Strap Locks Here #6: Ernie Ball Strap Locks
These are a relatively new addition to the strap lock market. Well, at least to my knowledge that is. However, they're perhaps one of the most innovative designs and perhaps the best out of all. Not only is this a fantastically designed product by Ernie Ball yet again. But, from what I hear, are some of the most durable on the market right now. What makes these cool, besides for their steel nickel plating make-up, is that provides 360-degree maneuverability which is epic. One downside is that you have to take out the existing strap pins of your guitar to install these. Which for me, is never an ideal situation especially if I've got an expensive guitar. Unless I'm dealing with a relatively cheap guitar. Or, If I have a professional install them. Check The Price Of The Ernie Ball Strap Locks Here #7: C CLTEIN Guitar Strap Locking System
This is another amazing strap locking system for your Gibson or Epiphone guitar. It will lock your guitar very securely and it will prevent your guitar from falling down ever. It is extremely easy to attach. There is no complex mechanism for attaching this to your straps. It is made up of a durable and sturdy material which can last for a long time. It is compatible with most of the guitars, be it bass, electric or acoustic. This can be a great option for the professionals who perform a lot on the stage. Check The Price Of These Strap Locks Here DIY Guitar Strap LocksDid you know that one of the most simple strap lock solutions is also one of the most popular? This is true indeed. Not only are these DIY strap locks used by the amateur guitarist. But, they're employed by some of the top professional guitarists in the world. All you have to do is find 2 Grolsch beer bottles, remove the red rubber stopper from the ca. And, there you have yourself a great DIY strap lock for guitar. Now there are some downsides to this method. And that is that it does not allow for as much maneuverability. But if you're on a tight budget, these will certainly do the trick. Or you could just do the EVH guitar strap lock trick and use bolts and keyrings. Electric Guitar Strap LocksWhen it comes to strap locks and electric guitars you have two choices. Either you get strap locks that attach onto your existing strap pins like the guitar savers. Or the D'addario locks. Alternatively, you get strap locks whereby you will have to remove the existing mushroom pins and replace them with the new system. Depending on the situation and the quality of the guitar, I am generally reluctant to remove anything from my guitar unless I really have to. But that is just me being silly. I know many guitarists who benefit from the proper strap lock systems. The most popular and best electric guitar strap locks seem to be the Shaller ones when it comes to installing systems. However, on the other hand, the guitar savers are the most popular cheap option. Acoustic Guitar Strap LocksNow when it comes to the acoustic, I tend to always only recommend a strap lock that does not need any installation. Once again, something like the guitar savers or the D'addario system would be best. I am of the belief that any slight change or modification to an acoustic guitar can have a drastic effect on the sound. Therefore, any strap locks that require minimal installation are the go-to ones for me. Also, would you want to go around removing things from your nice Martin or Taylor acoustic guitar when there is a perfect solution to avoid that. Bass Guitar Strap LocksFor bass guitar, you can pretty much take the same factors as the electric and acoustic guitars above. Electric basses are pretty much like electric guitars in the sense of their straps. The same applies to acoustic bass guitars as well as regular acoustic guitars. ConclusionSo, these are the top strap locks that you can buy for your guitars. Every guitarist wants their guitar to be completely safe and secure. These locks keep them safe and prevent them from falling down when you are performing. Hence, make sure to buy a really good locking system for your guitar that can last for a long time. If you are a beginner, make sure to choose something without any screws as that will be easier for you to install. Well, on the other hand, the performers or professionals must choose the screw locks so that it is completely safe to jump and play the guitar without any risk. The post Best Strap Locks For Electric, Acoustic and Bass Guitar appeared first on Guitar Pick Zone. via Guitar Pick Zone http://guitarpickzone.com/best-strap-locks/ How To Record Acoustic Guitars At Home On A Budget
The acoustic guitar remains one of the hardest instruments to record and get a great sound. It has a wide frequency spectrum, a large dynamic range and the sound you get is very dependant on the player. You can spend long, frustrating hours getting the perfect sound and recording it – but it can be worth it. Furthermore, there are so many variables that come into play. Which, will affect the overall sound and tone of the recording. A well-recorded acoustic guitar is a joy to hear. So, let’s take a look at what you need to know… Setting Up The Acoustic Guitar For Recording
The setup of a guitar is crucial to getting a good recorded sound. The sensitive condenser mics usually used will pick up any flaw and amplify it, so the better the guitar sounds acoustically, the better it will sound recorded. Make sure the acoustic guitar is properly set up with no fret buzz or tuning issues. Any problems of this nature, get it professionally sorted out. But first and foremost: use new strings. Old strings are duller sounding and also prone to tuning and intonation problems. New strings should have a 24-hour “break-in” period before recording, as this will let them settle tuning-wise and mellow some of the extreme high ends which can make the sound too brittle. Some modern brands of strings are polymer coated and sound a few hours old immediately and keep that “new string sound” for a lot longer. Always keep some String Glide or similar product nearby for those times when “string squeak” is an issue. Dusting fingers with talcum powder will help in a pinch too. Best Microphone For Recording Acoustic Guitar
There are rules set in stone, but a condenser mic will almost always give a better-recorded sound than a dynamic mic. The extra sensitivity and extended frequency range of a condenser mic capture the quieter elements and subtle high-frequency detail of the sound. My favorite is the KM 184 by Neumann. Many engineers will opt for a small diaphragm condenser. A large diaphragm mic may also be used but will lose a little of the finer detail of the sound. Recommended mics: Rode NT5, Oktava MC012, AKG C1000, Neumann KM 184 and the Shure SM57. Guitar Pickups For Recording Acoustics
Piezo pickup systems are a godsend for playing live, as they give an acoustic sound with little chance of feedback, but they are not as natural sounding as a microphone. Having said that, there are sometimes when you want an unnatural sound or even a blend of mic and pickup. If a guitar has a pickup, I will usually record it at the same time as the mic'd sound (making sure it is recorded to another track!), and then decide during mixdown how much (if any) piezo signal I want blended in. I’d rather have it and not need it… One thing with this technique: you will get phase cancellations between mic and pickup, so experiment with moving the mic closer and farther from the guitar until you get a good combined sound. Miking Acoustic Guitar Techniques
Getting the sound you want by choosing the correct microphone and mic placement will produce far better results than EQing an unsuitable tone. An acoustic guitar produces some of its sound from the neck, the entire length of the strings and even the back and sides of the box, so the mic needs to be a little distance (30 – 50cm) away to capture this accurately. It is tempting to put the mic closer to the guitar to get a better signal level, but don’t – this will make the sound boomy. Similarly, If you point the mic directly into the sound hole, it will pick up too much of the sound coming from the hole and be much too full sounding. One mic placement trick is to use your ear as if it were the mic – get down on your knees and move your ear around. You should find “sweet spots” where the sound is better. Single Mic Placement
Place the mic about 30 – 50cm from the guitar’s sound hole, and angle it toward the area where the neck joins the body. Move it towards the body for a warmer sound and moving it towards the neck will produce a brighter sound. Also, experiment with moving the mic upwards, so it looks down on the guitar or downwards, looking up. Stereo Mics
If you are recording solo guitar or small acoustic-based ensembles, you may want to record in stereo to enhance the depth and reality of the recording. When using two mics, bear in mind the “3-to-1 rule” – the distance between two mics should be at least three times the distance between each mic and the sound source (there is one exception – the X – Y technique mentioned later). This keeps phase cancellations to a minimum, resulting in a smoother sound that also translates well to mono. So, if the mics are 30cm from the guitar, make sure they are at least 90cm apart from each other. Spaced Pair
Two mics are placed apart from each other at the same approximate height, one pointing at the 12th fret of the guitar and the other at the bridge. If you’re not getting the sound you want with a spaced pair placement, try moving one or both microphones slightly to improve the timbre. Because spaced pair placement is subject to phase interference, moving one mic only an inch or two can dramatically change the sound. Spaced Pair Variation
As in the setup above, one mic points to the 12th fret. The second mic is hung from a mic stand at the performer’s ear level, pointing down at either the bridge or at the strings just behind the soundhole. So if the performer is right-handed, this second mic would be placed over the right shoulder. You can also move this ear-level mic slightly out in front of the player. And angle it back towards the guitar (versus pointing straight down at the floor), for a brighter sound. This technique usually yields a more open – but thinner – sound than the simple spaced pair on a horizontal plane. X-Y, or coincident-pair
X-Y, or coincident-pair, is the easiest approach to stereo miking. If you are willing to move the mics around a bit to find the sweet spot, you’ll find it’s hard to make a bad recording. X-Y miking produces a much narrower stereo image than the spaced-pair techniques. But it lends a smoother, warmer, and more natural sound to the acoustic guitar. Place the two mics close together so that their capsules are almost touching. The rear ends of each mic are spread apart at an angle of roughly 90 to 120 degrees. The result looks like a wide V shape, with one mic’s capsule positioned directly above the other. The 3-to-1 rule doesn’t apply to the X-Y technique because the two capsules are so close that sound waves arrive at both at essentially the same time. Thus, minimizing objectionable phase cancellations. To start, try placing the two mics opposite the 12th fret of the guitar. If you have a really nice sounding room to record in, try backing the mics up to a distance of one to two feet from the guitar. This will capture more room tone and yield a more natural sound. While the best-sounding position can depend upon the guitar, the room, or the mics. Typically, placing the mics around seven inches in front of the guitar’s 12th fret will tend to de-emphasize midrange frequencies. That’s because one mic will be pointing in the direction of the bassy soundhole. And the other towards the top of the neck, an area rich in high frequencies. ProcessingOnce you have everything set up and ready to go. You'll want to do some minor but important tweaks to this sound. This usually in the form of fiddling with the EQ along with effects like compression. I prefer to record without any processing first and once I have the recorded sound, I process afterward. CompressionUse a compressor/limiter to knock down any peaks (3:1 ratio). Set the threshold a little low to give it a slightly “squashed” or tighter sound. Set the threshold higher to just limit the peaks and give a more natural, open sound. EqualizationYou may need to eq out some boominess. If so, try rolling off some bottom (100Hz), or cutting a couple of dB at 300Hz. Adding a little eq around the mids will give you a sound that is a little more “woody”. Usually in the frequency range of 700Hz to 1.2KHz. To add some shimmer on the top end, try 8-10K. But be careful, too much will add noise. There is often one loud annoying frequency, somewhere in the lower mids. Therefore, you will need to use a sweepable midrange to find it and cut it. The post How To Record Acoustic Guitars At Home On A Budget: Microphones & Techniques appeared first on Guitar Pick Zone. via Guitar Pick Zone http://guitarpickzone.com/how-to-record-acoustic-guitars-at-home/ Best Guitar Strap For Back Pain - 5 Ergonomic and Comfortable Options
Your body is a temple, they say? If that's the case, you need to see my top 5 of the best guitar straps for back pain and heavy guitars Imagine being halfway through a gig and being struck by a sudden bout of back pain. It’s highly distracting, sucks all the fun out of playing, and does not help with your playing or concentration. Of all guitar accessories, the importance of good quality and a comfortable strap is most often overlooked. Whether you’re an acoustic, bass, or electric player, you can benefit from a solid strap. Although the strap won’t do anything about the weight of your instrument, it can distribute that weight in a comfortable way. This is achieved by adding padded elements and other clever innovations that help achieve this comfort. Below are some quick links to get you started.
At first, I'll review some conventional or traditional guitar straps. After which, I'll look at some more innovative products such as the weighted and dual straps. I also talk about what to look for in a good guitar strap. As well as the different types. You can use the short navigation below which will take you to where you need to be My Top 5 Best Guitar Straps That Are ComfortableBelow are my top 5 ergonomic straps for electric, acoustic and bass guitar. I've tried these all and this is my honest review and how they do for those suffering from problems whilst playing guitar. If you'd like to read more into ergonomic guitar postures, check this article here 1) KLIQ-Air Cell Strap
You absolutely cannot go wrong with black—it never seems too formal or too simple. Worn with enough confidence it even adds a certain edge to your vibe. Combine that with innovative technology, and you get the KLIQ AirCell. Leather just isn’t for everyone, and KLIQ Music Gear makes the most of this. While the ends are still made of leather to prevent any tears and mishaps, the strap itself is made of 3" wide neoprene, ensuring even weight distribution over your shoulder and back. The underside of the strap features unique AirCell technology which offers unprecedented support while preventing sweat. Don’t be fooled by its bumpy look. The padding is lush and unobtrusive, so you won’t notice the little knobs themselves, but you most definitely will notice the effect they have. Not only will your guitar feel like it’s floating, but there’s also even more to this product that makes it one of the best guitar straps out there. I like the price point of this strap and it is completely affordable for guitar players on any kind of budget. Features
Read more reviews and check the price of the Kliq Strap on Amazon 2) Gibson Gear Switchblade Electric Guitar Strap
The Gibson switchblade is by far the most comfortable guitar strap I've ever tried. The only reason it fails to make my number one spot is due to its high price tag. But, in all honesty, you get what you pay for with this strap. Gibson is known for making some pretty heavy guitars. The Les Paul is a great example of this. Also, their SG models have been known to have neck dive. With this switchblade strap, all of these problems are negated. Some guitarists say that this strap is a little overkill for lighter types of guitars. However, I believe that if you're a sufferer of any back problems from guitar, this strap will be the best choice for you. It costs considerably more, but if you're interested in your health and ergonomics, then I'd highly suggest getting this strap. Furthermore, it is one of the best straps for bass guitar out there. Especially because bass guitars are known to be so heavy. However, this strap will work on pretty much all electric, acoustic and bass guitars. Features:
Read more reviews and check the price of the Gibson Gear Strap on Amazon 3) Anthology-Gear Comfortable Guitar Strap
As the name states, this is a no-frills accessory of only the best quality. Some might find leather straps a bit old school, but ask yourself this: Why do we still appreciate film photography or scratchy old records featuring Keith Richards and Wilco who had no autotune? Suitable for acoustic, electric, and bass guitars, this strap is for those who want to add a bit of personality to their playing without compromising on comfort. The leather will burnish and develop a unique collection of scratches and other imperfections over time, making it 100% yours. And, the best part—leather becomes softer and softer with use. Features
Read more reviews and check the price of the Anthology Gear Strap on Amazon 4) Dunlop Black D3809BK Strap
Dunlop is a reliable name when it comes to manufacturing and they make fantastic guitar straps. While they have a multitude of other straps with amazing designs, we chose this little fella because of the patented comfort edge webbing and remarkable tensile strength. The webbing is designed to keep the strap from digging into your flesh, even when carrying heavier instruments. Since the strap is unusually adjustable, it’s ideal for tall players or bassists who like their instruments low. At first, it may take some effort to fit the ends onto your guitar, but they provide a secure fit and will become more flexible after some time. This strap offers a few different color options in bold, original jacquard woven and poly-woven designs. While it’s quite sturdy, it’s also surprisingly lightweight. In conclusion, the D3814GY features true comfort and practicality at a reasonable price, so you won’t be out of pocket after purchasing a single accessory. Features
Read more reviews and check the price of the Dunlop Strap on Amazon 5) Jacquard Weave-Hootenanny
Okay, simplicity may not be your thing. If that’s the case, this guitar strap from BestSounds is the perfect solution. This accessory will truly personalize your instrument and let you live out your personality. The Hootenanny features a unique and striking design, available in several colors, so whether you’re into floral patterns, braided patterns, skeletons, the sun, or animal print, there’s a strap for you. The strap is only two inches wide, so may not be the best choice for those with exceptionally heavy instruments. However, it offers genuine comfort through a double layer and exceptionally soft materials. The back of this strap is non-slip and woven from a myriad of fine threads which are interlocked along the way. Its wide range of adjustability makes it suitable for tall guitar players, shorter individuals, or younger players. Features
Read more reviews and check the price of the Jacquard Strap on Amazon **Bonus Strap Review** 6) LeatherGraft Leather Guitar Strap
Another leather strap, but this one with a vintage twist. The buckle creates an unusual look and makes you feel like walking into straight into the 1930s—or maybe a western movie. It’s the ideal accent for guitars with wooden bodies or warm color schemes. LeatherGraft has been making handcrafted leather-products in Liverpool, England since 1979. If a company has been around for such a long time, you can be sure they manufacture quality products. This strap is made from their new premium distressed leather with a soft suede back for extra comfort. Where the Jacquard Weave Hootenanny in more suitable for lighter instruments, this guitar strap was designed to carry the beasts. It’s able to carry instruments of up to 25kg, and the wide shoulder area is designed to lessen pressure on your neck, chest, shoulders, and back. Features
Read more reviews and check the price of the LeatherGraft Strap on Amazon Elements Of The Best Guitar StrapsNow that I've rounded up the good guitar strap options for those with bad backs, you should have a much better picture of solving your ailment. However, in order to make the best purchasing decision, one needs to think about a few key factors. Besides for the obvious comfort and ergonomic factors, there are some more considerations to keep in mind. The points below will guide you in choosing the most comfortable guitar strap for your needs.
Ergonomic Guitar StrapsIf you don't already know, ergonomics refers to the practice of good health when working or exercising. For example, you get ergonomic stools and keyboards. The same goes for guitar and their straps. Our body can take a hit from playing the guitar. And, believe it or not, we need to take care of our body otherwise we can do long term damage. That is why ergonomics is an important factor to consider, especially when it comes to those guitarists who suffer from back pain and other ailments. Double Shoulder Guitar StrapsThe dual guitar straps, we really start getting into specialist products specially designed for the purposes of what this whole article has been about. To refresh, these two things are comfort and ergonomics so that we can combat any physical pain whilst playing our beloved instrument. You'll notice that these double guitar straps are quite different from the conventional strap. And, at first glance, one might be very wary to try these out. However, They're actually pretty epic and once you start wearing one, you'll wonder why this hasn't caught on. Actually, that is most likely because it looks like the least rock n' roll piece of gear ever made. But, the important factor here is the comfort. And with these double guitar straps, you really do get the best weight distribution and a completely different playing experience that is well worth the try. a) Gruv Gear DuoStrap
This is the best double strap on the market. In my opinion, it not only feels the best in terms of comfort. But, the design looks the best in terms of style. And, the weight distribution is fantastic. In all honesty, the is possibly the best strap for back pain. What I like about this double guitar strap over others is that from the front, it looks like you're playing with a regular conventional guitar strap. Due to the fact that the dual-strap is concealed on your back. This is not the case with the other two below which make it pretty obvious that you're wearing a double strap. Furthermore, this is perfect for bass as well as electric guitar. Read more reviews and check the price of the Gruv Gear Strap on Amazon b) Neotech Harness Support Strap For Guitar
Now this strap looks more like you're about to go bungy jumping then it does like you're about to play guitar. Having said that, it is a pretty innovative and cool guitar strap that covers both your shoulders and make a harness guitar strap. Not only do the two straps cover your shoulders, but, there's are a torso strap which keeps everything together. This is a really epic strap. But, the biggest downside to this strap is that it will be very obvious that you're wearing this vest strap contraption. You might get a few odd looks but hey, comfort over style right!? Read more reviews and check the price of the Neotech Harness Strap on Amazon c) Weighted Guitar Strap
In around 2010, a company released a weighted guitar strap called the "heads up". This strap literally came with weights as well as a special pouch in which to place the weights. The reason this strap was designed was first and foremost to prevent neck dive. Which as mentioned previously, is a common issue for instruments like the Gibson SG among many others. However, over time, guitarists found that they could use these weighted guitar straps to create a sort of "bespole" strap set-up that suited the specific instrument in which they were playing. Unfortunately, this product (as far as I know) has been discontinued. Most likely because the dual harness strap takes care of this issue now. Although there's nothing stopping one from fashioning a weighted strap with a cheap version, some weights and some materials. Style Of GuitarA very important consideration to take into account when choosing a guitar strap is determining what instrument you'll be using the strap for. For example, A classical guitar will require a different strap to an electric guitar. Furthermore, you can get straps that can work on multiple kinds of guitars. In fact, most straps on the market today are compatible with a number of different kinds of guitars. However, there are still specialist straps. Scroll down a little more to see the different types of guitars and their respective guitar straps. Strap WidthYou might be wondering, what does the width of the strap have to do with comfort and ergonomics? Well, the truth is that it has everything to do with these two things. You see, the wider the guitar strap the more comfortable it will be. Not only will it be more comfortable, but, it will also help with bad backs or neck pain. This is because the wider design helps distribute the weight of the instrument better. A cool benefit of this is that a wide strap produces much less slipping. Adjustable Guitar StrapsBesides for comfort, a guitar strap needs to be adjustable in length. Some straps are more adjustable than others. For example, a leather strap might have 3 lengths available. Whereas a nylon strap can be adjusted across a much broader spectrum. It is also important to consider that different types of guitars will require a different length to be set on your strap. For example, if you interchange straps between your electric and acoustic, you'll find that you'll need to make the strap longer to accommodate the bigger body of the acoustic. The same goes for the other way around. Therefore, you can see the importance of adjustability when looking at buying good guitar straps Material Of StrapThe material from which the strap is made will impact both the comfort as well as the lifespan of the strap itself. You see, sturdy material such a leather or suede will tend to last a lot longer than synthetic materials such as cotton or nylon. Also, think about the impact the material will have on comfort. Would you rather have a nice plushy and comfortable guitar strap made from suede or a brash and thin strap made from a synthetic material Electric Guitar StrapsWhen it comes to electric guitars, it is important to consider that they generally weight more than acoustic guitars. For this reason, some different factors will come into play that you'll want to look out for. For my electric guitars, I always like to deploy the strap with the greatest width from my collection of guitar belts. This is because, as mentioned earlier, will help distribute the weight of the guitar more evenly. And you'll suffer from less back pain and neck cramps as a result. Acoustic Guitar StrapsFor the beginner guitar player, understanding different kinds of guitar straps can be confusing. This is most likely due to the fact that the acoustic guitar has various and differently designed straps that achieve the same purpose. For example, you get straps that attach to the top of the acoustics headstock which would just not be suitable if done on an electric guitar. Most guitarists tend to use your conventional guitar strap on their acoustics. This would essentially be the same one used on electrics. That is provided your acoustic has pegs that would accommodate this type of strap. Some guitar players I know even tend to use the newer clip-on straps, something like the D'addario clip on. Classical Guitar StrapsLastly, we have the classic guitar straps. These are generally completely different to both the electric, acoustic and bass straps. This is because the angle/position at which the classical is held differs to that of modern guitar styles and instruments. These classical guitar straps will thus help angle the guitar to the suitable classical playing position. Sometimes, these types of straps will even resemble that of a saxophone strap. Also, it's important to remember that most classical players will be sitting down. but will still utilize a strap to keep the instrument in place. Bass Guitar StrapsFinally, we have the bass guitar strap. In my experience, bass players tend to get the most back, neck and shoulder problems out of most string players I know. This is most likely due to the fact that most bass guitars are considerably heavier than traditional electric or acoustic guitars. As a result, this type of instrument will put a lot more stress on the player. For that reason, you'll often find bass players making use of the widest straps available with the most padding involved. A lot of bassists use padded guitar straps, even the ones who don't suffer from any guitar related injuries or ailments. ConclusionChoosing a well-made guitar strap is imperative if you don’t want to develop uncomfortable knots in your shoulder or sit with back pain after a gig. However, you don’t want to completely butcher your style for the sake of comfort. Luckily there are multiple guitar straps out there which are the perfect compromise between style and comfort. The post Best Guitar Strap For Back Pain – 5 Ergonomic and Comfortable Options appeared first on Guitar Pick Zone. via Guitar Pick Zone http://guitarpickzone.com/best-guitar-strap-for-back-pain/ MOOER CLONE LIST AND PEDALS REVIEWWelcome to my full and comprehensive Mooer Clone List. Mooer Audio is a pedal company that produces a range of clone pedals. However, in recent times, Mooer has begun making original pedals, along with their famous and popular Mooer clone pedal range. These span almost all the different types of guitar effects. And, at very reasonable prices too. Making them affordable to guitarists on every budget. You'll even see some well known guitarists using the Micro Mooer pedals. There a lot of lists on the internet about this topic. However, none review them as in-depth as this.
Mooer, make very good pedal clones at affordable prices. In terms of the types of pedals Mooer clone, one can see similar clones in the form of the Joyo pedals. I have a separate list of Joyo clones here. Mooer, however, unlike the Joyo range make mini pedals. And the compact and mini size of these Mooer pedals have become their main selling point and is what separates them from other pedal clone manufacturers. Contents
Mooer Mini PedalsIn my personal experience, these Mooer clone pedals were some of the first mini pedals I came across. And they were some of the first mini pedals that were made available at prices that most guitarists can afford. Whilst the Mooer clones might not have been the very first mini pedals to come out, they surely played a massive role in popularising mini guitar effects pedals. I must note that I've tried to add video comparisons of each of the Mooer clone list and the originals for which they were based off. My hope is that the videos will give more context to my written explanation of these pedals by Mooer. I also aim to review each of these Mooer Mini clone pedals below. How Do We Know These Are Definitely Clone Pedals?I don't think that it is any secret that the Mooer pedals are, for the most part, clones of other popular and/or discontinued pedals. Like I've mentioned, Mooer have since begun making their own original pedals. But it was these mini clone pedals that have made Mooer so well known. And, gave them the platform to eventually start creating and producing their own pedals. But, if you'd like confirmation that these are definitely clone pedals, we don't have to look too far to actually recognize which pedals these are clones of. let's look at two giveaway factors right off the bat:
What About The Digital Pedals?For the most part, digital pedals are pretty impossible to clone. I mean, they've been programmed in a specific way etc. This may not be true for all the digital clones, but, saying for example that the Shimverb is a Strymon clone would be highly inaccurate. However, most of the digital pedals definitely take some inspiration from the originals pedals that they're aiming to clone. The rest of the analog pedals are pretty easy to clone and we can pretty much confirm their purpose. Mooer Acoustikar Review: Acoustic Guitar Simulator Effects Pedal
The Acoustikar by Mooer Audio is a clone of the Boss AC-2 acoustic simulator pedal. However, the Boss AC-2 is no longer available to purchase new. But, Boss has a newer acoustic simulator pedal in the form of the AC-3 which is practically identical to the AC-2. So how does the Mooer Acoustikar fair as a clone? For an acoustic simulator clone of the legendary Boss, this pedal does incredibly and I'm very impressed with its capabilities of being able to sound like an acoustic guitar. How does the Mooer Acoustikar differ to the Boss AC-2? There's a distinct difference in the way each of these two pedals sound. The Mooer delivers a brighter and crisper sound. This characteristic of the Mooer is maintained despite which mode you choose. The Boss, on the other hand, sounds a lot more mellow and warmer. Mooer Acoustikar vs Boss AC 3 / AC 2The Mooer has the same controls as the Boss however, it is missing an extra mode. This is the "Enhance" mode. If I'm honest, I'm glad Mooer didn't add this as part of the clone. I tend to find this mode on the Boss AC-2 pretty much useless. Take a look at the video below which does a comparison between the Mooer and the Boss. By watching it, you really get to see the tonal differences between these two. When it comes down to it, I have a tough time choosing which one I prefer. I like the sounds of both. Mooer Ana Echo Review: Analog Delay Pedal
Boss DM-2 is definitely one of the most classic Boss guitar effects pedal from the early days of the compact stompboxes. This Boss DM-2 is still an exceptionally sought after pedal. Especially due to the fact that Boss stopped making them for a very long time. It is only now in recent times that they've reissued these. Before then, it was hard to get your hands on this epic analog delay. That was until Mooer created this great clone. The Ana Echo analog delay is the Mooer mini version of the DM-2 by Boss. These are both analog delays with. However, I'd say that the Boss DM-2 sounds more natural to my ear. There's also a certain organic decay that the Boss has which the Mooer doesn't. This is such a minor detail that most people won't ever notice. The Mooer is more than sufficient in earning its place as a great clone to the Boss DM-2. Furthermore, the Mooer Ana Echo has a V3205 BBD Coolaudio chip, which thus makes a truly analog delay pedal. For some guitarists, the delay time on both the Boss as well as the Mooer Ana Echo is too short. With a maximum time of 300ms. Having said that, I truly believe that these are great pedals for your slap back as well as shorter delay sounds. I also believe this is what they are best used as. Digital delays are better suited for your longer delay times. The layout in terms of knobs that you get with each of these two pedals is exactly the same. Both have knobs to control:
Mooer Ana Echo vs Boss DM-2The colors are also pretty darn similar. Thus, further confirming confirmation that this is a clone. The video down below this is a fantastic demonstration of the Mooer Ana Echo Vs Boss Dm-2. Listen carefully as it can be quite hard to distinguish between the two pedals. As I've already said above, I do tend to find that the Boss has a more "analog" sound if that makes sense. There's honestly just something about the decaying notes that the Boss DM-2 produces which the Mooer Ana Echo misses out on slightly. Completely unnoticeable in a gig or live band setting. Mooer Black Secret Review: Distortion Pedal
Mooer clones two classic Rat distortions into a mini pedal, the Black Secret. There aren't many distortion pedals that have as a unique and distinct tone as the ProCo Rat. This Rat distortion, whilst still in production, is one of the most legendary distortion boxes ever to be built. The older ProCo Rat distortions sell second hand for a lot of money. And, the new ones are also a tad bit on the expensive side. Luckily for us guitar players on a budget, we can get our hands on the vintage Rat distortion sound. But there's even more... Due to the success of the ProCo Rat, the same manufacturers brought out the Turbo Rat. Which, as the name would suggest, is a bit more abrasive and "turbo-charged". The Turbo Rat become just as famous and loved as its predecessor. Furthermore, Mooer has packed both the classic ProCo rat along with the Turbo Rat distortion into one mini pedal. Essentially giving us two clones in the size of one small pedal. Being able to toggle between the classic and turbo rat distortion sounds makes the Mooer Black secret an amazing clone of the ProCo Rat. Mooer Black Secret vs ProCo Rat DistortionEspecially when you consider the affordability of this pedal. In terms of how these two sound compared to one another, the original Rat definitely sounds fatter and "more alive" if that makes any sense. The Mooer Black secret still achieves the specific tonal characteristics of the classic Rat distortion. I have placed a video just beneath this to show you a sound test of the Mooer Black Secret Vs ProCo Rat distortion. It is definitely worth pointing out that the Mooer black secret comes with an LM308 chip installed. Mooer Blade Pedal Review: Metal Distortion
If you're wondering if the Mooer Blade distortion is really a clone of the massive EHX Metal Muff. you can be at ease knowing that it is indeed a clone of this very pedal. In my opinion, it is nothing short of genius how Mooer managed to turn such a large pedal into such a mini clone. There does, however, seem to be a fair bit of debate surrounding the fact that the Mooer Blade could be a Boss Metal Zone. The consensus does seem to learn more towards the Mooer Blade being an Electro-Harmonix clone. For the sake of this Mooer clone list, and due to the fact that my knowledge and experience of metal pedals is limited. I'm going to compare the Mooer Blade and the EH Metal Muff. Let's take a look at the Metal Muff first, and then determine how the Blade distortion does as a copy. Right off the bat, we can see how big the Metal Muff is. Despite this, it does offer an extra boost switch. The Metal Muff has 6 controls which include:
Mooer Blade Metal Distortion vs EHX Metal MuffThe Mooer Blade is designed in a completely different way to the Metal Muff. Besides for the obvious smaller size, the Blade distortion only has three knobs but includes a 3-way toggle switch. The knobs include volume control, tone control and well as a distortion control. The toggle, however, gives you the options of a top boost, a lo boost or the middle function which is no boost. The Mooer Blade does not have an extra switch to engage the boost function, something that the EHX Metal does have. However, in terms of sound, this pedal produces tones similar to that of the Metal Muff as well as the Boss Metal Zone. In the video I have added below, it demonstrates the Mooer Blade vs EH Metal Muff. However, instead of the bigger version, it is up against the micro version as I have not found a suitable comparison video yet. Despite this, you should still get a pretty good deal of how the pedals sound up against each other. I actually prefer the sound from the Mooer Blade a lot more If I'm honest. Mooer Blue Comp Review: Clone Of The Boss CS-1
The majority of guitar players and gearheads out there are under the impression that the Mooer blue comp is a clone of the Boss CS-2. If I'm honest, it was only until I did some investigating that I discovered this is in fact incorrect. The Mooer Blue comp is actually a clone of the often forgotten about, very rare, and old Boss CS-1 compressor. There are a few characteristics and features of the Mooer Blue compressor that give away the fact that its a CS- clone.
The only difference, however, is that the Mooer has an extra "Attack" control. Which adds a whole new parameter and versatility to this already great pedal. I don't know much about the Boss CS-1 but I do know that they are quite hard to come by. Boss discontinued this pedal a long time ago and replaced it with Boss CS-2 (also now discontinued) and now a Boss CS-3. So for that reason, I think it is really awesome that Mooer decided to clone such a rare, yet classic Boss compressor pedal. Mooer Blue Comp Vs Boss CS-1 / CS-2I'd love to be able to get my hands on a Mooer Blue Comp Vs Boss CS-1 comparison. Or even a Blue Comp vs Boss CS-2 comparison. However, I've yet to find any of these. For the meantime, I have added a demo of the Mooer Blue comp so you can get an idea of how it sounds like a compressor pedal. Many have asked about the difference between the two sounds of the "Normal" and "Treble" switch. Essentially, the Normal setting accentuates the sustain more. Whilst the Treble switch accentuates and sustains the top end. Blue Comp vs Yellow CompThe blue comp is a more complex pedal than the yellow one. The blue comp has an extra two-way toggle switch which allows for more tweaking of your sound. I talk about what the toggle does above. The Yellow one, on the other hand, is a simple three-knob comp pedal and in my opinion, delivers one of the best sounds from any cheap comp pedal I've ever tried. If you're not sure which one is for you, my advice would be to go for the yellow comp. Mooer Blue Faze Review: Fuzz Pedal
In this Mooer range of mini clone pedals, there are two Fuzz pedals. This Blue Faze is a clone of the classic Arbiter Silicon Fuzz Face (Now made by Dunlop). Not to be confused with the other Fuzz pedal on this Mooer clone list, the Grey Fuzz. The Blue Faze is based on the Silicon Fuzz Face and makes use of the BC108C silicon transistor. Which, is the vintage type of transistor that would have been found in the original Fuzz Face pedals. When it comes to fuzz and distortion in general, this silicon fuzz face was one of the first to ever be created. This silicon fuzz face is what basically started the guitar pedal, as the stompboxes we know them today. The worlds greatest electric guitar player, Jimi Hendrix used a silicon Fuzz Face. And, if achieving a similar tone to Jimi is what you're after, I suggest starting with one of these. Now, the Silicon Fuzz face is still available on the market today. Despite having gone through different companies, Dunlop now makes these in pretty much the same fashion as the old ones. They can, however, become quite costly. But, the Mooer Blue Faze is a particularly good clone for a budget pedal. The Silicon Fuzz Faces are known for being a rather wild and in your face fuzz tone. I like to describe it as a brash fuzz, but I the word "brash" in a positive way. What I mean by this is that when you engage the pedal, you'll definitely stand out. Which is something I love about the sound of these. They're full-blown fuzz in the true sense of the word. I much prefer the silicon fuzz sound to that of the germanium fuzz pedals. Mooer Blue Faze Vs. Dunlop Silicon Fuzz FaceThe question still remains. How does the Mooer Blue Faze match up to the Dunlop Silicon Fuzz face? In my opinion, the Blue Faze just as alive as the original Fuzz face. Furthermore, it has the ability to clean up pretty well when you roll back the volume on your guitar, much like the original pedals do. This Mooer Blue Faze features the exact same controls as the original fuzz face. A super simple layout that lets you control the amount of fuzz. As well as the overall volume of the fuzz. I think the Blue Faze does a fantastic job of trying to sound like the Dunlop silicon fuzz face. Mooer Audio Blues Crab Review
I am so glad that Mooer has released a pedal that is a clone of the original Marshall Blues Breaker pedal. I mean, Marshall does have a newer V2 of the Blues breaker but it is not quite like the original. To my ears, I'd say that the Mooer Blues Crab is even closer to the sound of the Vintage Marshall Blues Breaker pedals than that of the actual Marshall BB-2. Finding that original blues breaker tone was difficult until Mooer released the Blues crab. The Marshall Blues Breaker was designed to give us the overdriven sound of an old tube amp that is being pushed. It gives us that large, open and gritty sound that is so prevalent in blues music. And, the Blues Crab does just that. A great pedal and the best guitar pedal for low gain overdrive that I've used in a long time. Another fantastic application and use for the Mooer Blues crab is to stack it along with another overdrive pedal. I'll stack the Blues Crab into my tube screamer pedal every so often to achieve a pretty epic tone for blues lead. Blues Crab vs BluesbreakerMooer's clone pedals are all very close to the originals they're cloned after. However, in my opinion, this Mooer Blues Crab is by far the closest sounding pedal to the original that I've come across yet. Seriously, It was only until someone pointed out that the Original Blues Breaker is a bit more smooth sounding when compared to the Blues Crab that I noticed this difference. However, this is only barely noticeable and I've actually become fonder of the Blues Crab than the original Marshall Blues Breaker. This is such an incredibly good pedal and great value for money. Mooer Blues Crab vs Blue MoodThe Blues crab is more of a clean drive pedal that is merely meant to boost or push the front of a tube amplifier. Either to an amp that is about to break up or an already driven amp. The blues mood, on the other hand, has more gain on tap and can be used to achieve subtle gain to crunch bluesy goodness. Mooer Blues Mood Review: Overdrive Pedal
Mooer Audio have made sure the blues sound has been covered by adding yet another blues-style overdrive pedal to their range of clones. This time, Mooer have the Blues Mood pedal, which is a clone of the famous and extremely popular, Boss Blues Drive BD-2. However, Mooer didn't just stop there. No, in fact, they went a step further and cloned the Boss Blues Driver with the legendary Keeley Fat mod. I think it is awesome that Mooer not only cloned a legendary pedal but made sure that they got the most out of the clone by copying the Keeley mod version. This mod is something that can become quite costly because not only would you have to purchase the actual BD-2 pedal but then would have to pay for the actual modification. But, Mooer has given us budget pedal enthusiasts a much cheaper option in the form of the Blues Mood. I'll discuss what the mod does and sounds like a little further below. Mooer Blues Mood Vs Boss BD 2The Mooer Blues Mood, just like the Boss BD-2, Compresses in the same nature to that of a tube amplifier. And this results in a very smooth and creamy sounding drive. However, when the drive knob is maxed out to its fullest potential, you can start to reach some low distortion. As a clone of the Boss BD-2, the Blues Mood holds up very well. And with the addition of the "Keeley" style mod, the Blues Mood is a no brainer. Much like the Blues Driver by Boss, the Blues Mood can be used as either a boost pedal by adjusting the gain knob to zero and boosting the volume knob. Or, can be used to achieve the overdriven tube amp sound. This can be achieved by playing around with the gain knob. Both the Blues Mood and the Boss BD-2 make for pretty versatile drive/boost pedals. Especially with the fat switch option. The "Fat Switch" (Inspired by the Keeley Mod)Okay, so by now you're definitely wondering what's the Keeley mod that I'm mentioning. Well, let's give a little background first. You may or may not know Keeley to be a pedal manufacturer. But, if I'm not mistaken, started out making pedal modifications which skyrocketed the name. One of the most famous Keeley modifications was done to the Boss Blues Driver. This modification came in the form of a "fat switch". Engaging this switch results in a "fatter" sound with more low end. This modification is said to enhance the tonal capabilities of the Boss BD-2. Which is something I would have to agree with. Something definitely worth mentioning is that the Blues Mood also sounds great when used on the bass guitar. There's a video down below which is a Mooer Blues Mood review. It also compares it o the Boss BD-2. But unfortunately, the BD-2 in the video does not have the Keeley mod. Mooer Cruncher Review: Distortion Pedal
Mooer Audio Cruncher, a clone of the MI Audio Crunch Box. So far in this list of the best Mooer pedals, it's pretty easy to see how great some of the clones are. However, in my opinion, Mooer fell a little bit short with the Mooer Cruncher. Whilst still a great sounding pedal for the price, I feel it lacks some of the qualities and characteristics found in the original MI Audio Crunch Box. I am in no way saying the Mooer Cruncher is not a good pedal, however. It just does not match up to the Crunch Box, or the Angry Charlie which is another similar type of distortion pedal. Having said that, the Mooer Cruncher still have some decent applications and, when dialed in correctly, can achieve low, medium and high-ish gain tones. Mooer Cruncher Vs MI Audio Crunch Box
The Cruncher by Mooer pedals is an outright gain pedal. What exactly do I mean by this? Well, it is a distortion pedal designed with enough gain on tap to get anything from low gain distortion to searing leads. This pedal is great for the rock genre and whilst it can get awesome lead tones, you're also able to get epic chunky rhythm tones. Something that is not talked about often enough with the Mooer cruncher is that fact that the very essence of the pedal was designed to be a "Marshall in a box". This is not the first Marshall in a box and there's even another one on this list of Mooer pedal clones. I do find that the original I Audio Crunch distortion has more "bite". Which, is what separates it from the Mooer Cruncher in my honest opinion. I do tend to find that when the gain is all the way full and the tone knob level is over 12 o'clock, the sounds gets quite fizzy for my liking. It is at this point where I tend to prefer the original MI Audio Crunch box. The MI Audio Crunch box was is designed with very high-quality components and it could be considered a boutique pedal. As a pedal that uses cheaper mass-produced components, the Mooer Cruncher gets close, but not right on the tone of the pedal it is based on. A cool effect I learned to get out of this pedal is to dial back the tone all the way to achieve a "Queens Of The Stone age" type distortion. Pretty cool. Mooer Echolizer Review: Delay Pedal
I love this pedal! It sounds absolutely epic for what it is. So what is it? It is essentially a clone of the vintage (and I think rare) Maxon Ad999 analog delay. Now, the Mooer Audio Echolizer is actually, in fact, a digital pedal. But, it does the most spectacular job of recreating those classic old vintage analog delay tones. You can go from short slapback delay sounds to longer and more decaying delays. The longer delays sound amazing to me but the great thing about this pedal is how versatile it is considering the fact that it is somewhat limited from 25-6oo milliseconds. The tones you can get out of this pedal is still amazing considering the price of it when compared to the actual Maxon AD999. There are quite a few Mooer pedals which are clones of delay pedals such as the Reecho and Ana Echo. However, this echolizer is the one Mooer delay pedal that stands out the most to me. Some guitar players believe that this Mooer Echolizer should only be used through your amps effects loop. I tend to find this true, especially if you're looking to get the best out of the echo pedal. Having said that, I don't believe that it is fully necessary to have to put it through the loop. I use a pedalboard with my delays and modulation hitting the front of the amp. This has been on my board and I did not experience any problems running it straight into my amp. Mooer Echolizer vs Ana EchoThese two pedals may seem similar because they are both echo-based delay pedals. However, they are actually quite different. The Ecolizer has a longer delay time compared to the ana echo. It has a maximum of 600ms whilst the ana only has 300ms maximum. For me, they Echolizer wins over the Ana Echo. However, if you're looking to replace the Boss Dm-2 then the Ana Echo is for you. Mooer Eleclady Review: Analog Flanger
I must be honest, flanger was never one of my favorite effects out there. However, that was until I discovered the EHX Electric Mistress and later on, the Mooer Eleclady. I also realized that I had only ever tried digital flanger effects which I hated. Whilst these flangers are both analogs. I always thought flanger was an effect strictly for heavy metal use. However, it was it was only until I started exploring effects pedals, as well as watching an episode of "That Pedal Show". Which, opened up my eyes to the world of flanger, and the EHX Electric Mistress in particular. The Mooer Eleclady is a clone of the Electric Mistress by Electro-Harmonix. And, it manages to clone this legendary flanger in a fraction of the size of the original. The Mooer Eleclady, with its small and sleek design, offers three knobs as well as a 2-way toggle switch. The knobs include:
Whilst the toggle switch lets you flick between "filter" or "normal" modes. Normal mode is your classic analog flanger sound. Whilst engaging the filter modes will result in some awesome oscillation. Mooer Eleclady vs EHX Electric MistressThe Eleclady makes for a great clone of this awesome EHX pedal. However, there are definitely some slight tonal differences between these two pedals. You'll find the Mooer Eleclady to give you more top end. Whilst, the Electric Mistress is definitely mellower and more "organic" sounding in terms of analog flanger. One huge and obvious difference between the two is the size difference. The original EHX electric Mistress is absolutely massive and I'd consider it not pedalboard friendly at all. The Mooer, on the other hand, is perfect for the pedalboard. Having said that, Electro-Harmonix does make a newer, and smaller version of the classic Electric Mistress. Mooer Ensemble King Review: Chorus Pedal
I've mentioned before in another article that the Boss CE-2 Chorus pedal is my all time favorite chorus pedal. This is due to the fact that my guitar idols from the 80's used this very pedal. Boss unfortunately no longer make this version of the Boss CE-2. In fact, the pedal has been discontinued for quite some time. For that reason, my original Made In Japan CE-2 has become an item of value. As a result, I'm exceptionally reluctant to take it out gigging. And I'm also reluctant to put it through any unnecessary wear from stepping on it. Thus, finding a suitable replacement for my favorite chorus has been tough. But Mooer kind of knocked this one out of the park, providing a great clone that makes use of an MN3007 chip. Which, is the chip found in these old Boss chorus pedals. I could be wrong about this though, please leave a comment down below if this needs correcting. For me, this is the best cheap chorus pedal out there despite what I've said in the past. Mooer Ensemble King vs Boss CE-2
Whilst there are some definite similarities in the way both these pedals sound, there are also some differences in the way in which the Mooer Ensemble chorus was designed. The biggest difference can be seen on the Mooer Ensemble with the addition of an extra volume knob. The Boss CE-2 came with only two control, which let you control the depth and the rate. But, the Boss CE-2 failed to come with a level knob. Something which could've been useful on such a legendary pedal. However, the Mooer is a pretty versatile chorus with a wide array of chorus effects. You can achieve anything from a thick, lush and natural sounding chorus. I like to use this pedal as such, to get the warm sounding chorus that can be found all over music from the '80s. You can also set the pedal for a more subtle chorus sound should you wish. When the pedal is maxed out to full, it starts to even produce a Leslie kind of tone, which is almost like an organ in the way it sounds. I like the overall naturalness of the chorus sound I get from the Mooer Ensemble. Many other cheaper Chinese clone pedals tend to produce a tiny and thin chorus tone which I don't like. The Mooer Ensemble king does not do this, and that is why I think it is such a great clone. It's pretty tough, I would imagine, to recreate such a legendary Boss pedal. But, Mooer does it really well with this pedal. Mooer Flex Boost Review: Clone Of AC Booster Xotic
Some of the best boost pedals, overdrive pedals and preamp pedals on the market are by Xotic effects. By making some of the best of these types of pedals, most of the Xotic effects pedals come with a pretty hefty price tag. Mooer pedals, however, have created a suitable clone of this awesome AC Booster pedal by Xotic effects. This happens to be 1/2 Mooer clones of the Xotic booster pedals. So this review is on the Mooer Flex boost and, down below you'll find a review of the Mooer Pure Boost. There are some definite differences between them. So what is the Mooer Flex Boost? Well, it's one of the closest sounding clone pedals of the AC booster by Xotic effects that I've come by. Whilst the Mooer Flex Boost and the AC Booster have the word "boost" in their name, it is actually important to note that both of these pedals are in fact overdrive pedals. However, they're overdrive pedals that maintain the integrity of your amplifiers sound by not coloring the tone. The Flex Boost by Mooer pedals and, the AC Booster at first and foremost overdrive pedals. But, guitar players quickly discovered that by backing off the gain and increasing the volume off the pedal. They were able to achieve a pretty clean and transparent boost. Mooer Flex Boost Vs AC BoosterI must definitely point out that the Flex Boost has got some grit to it. As soon as you start to turn the gain knob up from zero, you can hear some light and pleasant overdrive. How does it compare to the AC Booster? It comes pretty darn close to the real thing. However, as is the case with a lot of clone pedals, they just miss out on not sounding quite as "organic" as the originals. Still, a great sounding low-gain boost/overdrive pedal. I like to the use the Mooer Flex Boost for two specific applications. Firstly, I like to stack it with another overdrive pedal. For example, running this Flex boost into bluesbreaker pedal delivers the most epic of tones. Secondly, I like to use the flex boost to add fatness and girth to my single coil guitars. I interchange between humbuckers and single coils for some gigs. And as a result, there's often a disparity in the level of tone between the two pickups. I there like to beef up the sound of the single coils with the Flex Boost. I do this by turning the gain all the way down and boosting the bass as well as the volume. Mooer Flex Boost Vs Pure BoostThere is quite a big difference between these two. The flex boost is, in fact, a drive pedal which can also be used as a boost. Whereas the pure boost is a clean boost. In my opinion, the flex should actually be called an overdrive pedal. Mooer Fog Bass Fuzz Review
The Mooer Fog is actually a bass pedal. But can definitely be used on the guitar, too. Apparently, this Mooer pedal is a clone of the Zvex Woolly Mammoth (also a bass pedal). The pedal Features 4 knobs which include; tone, volume, fuzz, and squeeze. The "Squeeze" parameter is where you can craft your own fuzz sound and can be related to the "pinch" knob on the actual Zvex Woolly Mammoth. The Sound Of The Fog Fuzz Mooer Pedal?The Mooer Fog along with the Woolly Mammoth is like no other fuzz tones I have heard. A lot say you can get them to sound like Big Muff pedals. But I disagree. The Mooer Fog delivers a synth-like type of fuzz. Also, the words "snarly" as well as, "nasally" come to mind when I hear these pedals. At times, the sound tends to remind me of bit-crusher sounds. I know that there are many bass guitar players out there that swear by both the Mooer Fog as well as the Zvex Woolly Mammoth. I must be honest, I do not enjoy the sound of this pedal in general. Having said, these pedals do the bass sound from the band, "Muse" pretty well. So if you're a bass player in a Muse cover band, then I highly suggest getting on of these pedals. There are some settings on the fog that you can set which will maintain the low end somewhat. However, for the most part, this pedal tends to cut out the low end. And as a result, you're left with an underwhelming fizzy sound. This can often be the case with not only these bass fuzz pedals but bass fuzz pedals in general. That is why it is recommended running a separate dry signal to maintain the low notes of the bass. After all, that's what the bass is there for! It makes no sense to me, to use a pedal that cuts out the very essence of what the instrument was intended for. Alas, I am biased due to the fact that I'm in a band with a bass player that has never used any pedals. Mooer Fog Bass vs Zvex Woolly Mammoth?There's no real scenario where one can justify the price of the Woolly Mammoth when the Mooer Fog does literally exactly the same thing. However, even though the Mooer fog is definitely more affordable, it's hard for me to find a need (besides for if I were the bass player in a Muse cover band) to buy or make use of this pedal. It's worth pointing out that the Zvex has a built-in gate which can be engaged by playing with the "pinch" knob. I'm almost certain the Mooer doesn't have this gate function although I could be very very wrong. Mooer Funky Monkey Review: Auto Wah
An Automatic Wah pedal clone comes in the form of the Mooer Funky Monkey. I could be mistaken when I say that Boss produced one of the first compact stompboxes to feature an Auto Wah that was not an outright envelope filter. These are not envelop filters at all! Whilst this may not be the case, the AW-2 by Boss gained a loyal yet niche following. Whilst Boss have a newer version of this legendary pedal, the actual AW-2 was discontinued and no news of it ever coming back. For that reason, it is great that Mooer was able to clone this pedal and bring it back to the pedal market. Especially for those of us (like myself), who are not able to get their hands on the original AW-2. But, is the Funky Monkey by Mooer Pedals are suitable enough clone to keep the name of the Boss AW-2 alive? And, is it really a true clone of the Boss AW-2? I had been wondering the same question. Let us take a deeper look.. Mooer Funky Monkey vs Boss AW-2
At close inspection, it is easy to see that they Mooer Funky Monkey is laid out pretty different to that of the AW-2. However, this is certainly to be expected considering the small size of the Mooer. That being said, let's look at how the Boss AW-2 is laid out and then note the differences son the Funky Monkey. The Boss AW-2 gives you four knobs to play with. Each knob has a wide spectrum of tonal capabilities. The knobs on the Boss include; rate, depth, manual (lo to hi pass filter) and sensitivity. The Mooer Funky Monkey, on the other hand, is a bit different. This Mooer pedal gives you three knobs as well as a 3-way toggle switch. Making this pedal exceptionally versatile for an Auto-Wah. The three knobs on the Funky Monkey include:
The Funky ToggleFurthermore, the 3-way toggle switch will set the tonal quality of the wah. These 3 on the Mooer Funky Monkey includes:
Explaining this 3-way toggle switch, and this auto wah pedal, in general, is very tough. As describing an auto-wah is immensely difficult to put into words. However, the video below should give you more than a sufficient look at this pedal as well as the tones you can achieve from it. Mooer Funky Monkey For Bass?You could perhaps use this on bass however I would not recommend doing so before doing more research on the topic. In my opinion, I'd recommend going for the SWEEPER pedal, also on this clone list. Mooer Graphic B Review: Graphic Equalizer Pedal For Bass
Mooer's bass graphic equalizer pedal. This is based on the Boss GEB-7, the bass version of Boss's famous graphic eq pedal. However, this is the bass version therefore both the Mooer graphic B as well as the Boss GEB-7 have a different frequency range to that of a regular guitar eq pedal. Notice above how I make use of the words, "based on" and NOT "clone" for this particular pedal? Well, that's because this Mooer Graphic B is most certainly not a clone of the Boss GEB-7. In fact, no pedal on this Mooer clone list is further off being like the original than this Graphic B. Please don't get me wrong though, this Graphic B is such a great pedal and does an exceptionally good job at being a bass graphic EQ. If I were a bass player I'd have absolutely no problem chucking this onto my board. It's just not a Boss GEB-7 clone. Mooer Graphic B vs Boss GEB-7So how am I sure this is not a clone? There are two massive dead giveaways that tell me this isn't a Boss clone. Firstly, the frequencies are completely different from the Boss. Secondly, the Mooer is a 5 band EQ whilst the Boss is a 7 band eq. Here is a closer look at the difference in frequencies between Graphic B and the GEB-7:
There's an obvious disparity in the way each of these bass eq pedals was designed. However, one cool feature about both of these pedals is that they have a level adjustment. This enables you to add a volume boost to your eq, or you can just use it as a clean volume boost. Mooer Graphic G Review: EQ Pedal
According to a few forums and other sites I've visited on the same topic, I've come to find that many claim and believe the Mooer Graphic G to be a clone of the Maxon GE-601. The only similarities that these two pedals have are that they're both equalizer pedals for guitar. And they both feature a level knob. Other than that, the commonalities between the two, run dry. A similar instance occurred with the Bass eq above whereby it has been claimed to be a clone of another EQ pedal which it clearly isn't. However, let me outline the major differences between the Mooer Graphic G and the Maxon GE-60. Two major red flags stand out to me in an instant when determining whether or not this is, in fact, a clone. Red flag number 1 is that the Max GE-601 is a 6 band eq. Whilst, the Mooer Graphic G is very clearly a 5 band eq. Red flag number two can be found when comparing the frequencies of each of the two pedals. The maxon has different frequencies to the Mooer. Here are the differences in frequencies between the Mooer and the Maxon:
Mooer Graphic G vs Maxon GE-601There are some similar frequencies here. However, the Mooer is still missing an extra frequency band compared to the Maxon. And, some of the frequencies are different. The best part with both the Maxon and the Mooer is that they each have a separate level control. I like to use this as a straight up volume boost. Deciding on which of these two EQ's are best for me, come down to one thing. And that thing is space. If my pedalboard is cluttered I'd opt for the Mooer. Otherwise, I'd take the Maxon due to its extra band of frequency. I always think having an eq pedal on your board is a great idea. Since adding one to my pedalboard, I can't imagine what life used to be like without an equalizer pedal. Mooer Green Mile Review: Overdrive Pedal
Tube Screamer clone pedals are a dime a dozen nowadays. In fact, the market is completely flooded with Tub screamer type clones. In my opinion, however, very few pedal manufacturers have managed to nail the TS clone down at an affordable price. Mooer pedals along with Joyo pedals make two of the best tube screamer clones out there. Whilst the Joyo clones the TS808, this Mooer Green Mile clones the just as legendary and famous, TS-9. After some investigating, It's definitely clear that the Mooer Green Mile used the Ibanez Tube Screamer 9 as a base to create this clone. It even has a JRC4558 chip. However, the Green Mile is not identical to the TS9. The Green Mile, like the TS9 has a level, tone, and gain knob. However, the Green Mile has an extra 2-way toggle switch. This switch lets you flick between "warm" and "hot". The Green Mile Sound?The "Warm" setting is pretty much your standard and classic TS-9 sound. The "Hot" setting is bigger sounding and delivers more gain and a lot more midrange. The "hot" setting on the green mile is very reminiscent of the Ibanez Turbo Tube Screamer. Which, also has a Hot mode. The Turbo TS also uses the TS-9 as a basis for the pedals sound. Therefore, I don't think I'd be too far off from saying that the Green Mile is more of a clone of the Ibanez Turbo TS9DX, rather than the classic TS-9. Mooer Green Mile vs Tube ScreamerThe Green Mile Mooer is an incredible budget overdrive pedal with a great sound and convenient size. But, even if you ignore these factors, it's still impossible to ignore how absolutely darn good the Green Mile sounds. Even though it is more affordable than the TS9, it's still better sounding to my ear. And, with the Hot channel included, you get such awesome versatility out of such a tiny unit. This is the epitome of dynamite in a small package. I'd say Mooer pedals did a pretty stellar job in separating their tube screamer clone from the rest out there. Mooer Grey Faze Review: Fuzz Pedal
I like the Mooer Grey Faze a lot. I also think it fares well as a clone of the Germanium Fuzz. This pedal has a super simple layout. With only a volume knob and a fuzz knob, much like the Dunlop Germanium fuzz face.. The fuzz knob controls the volume of the fuzz effect. Whilst the Fuzz knob controls how much fuzz you want. I find the fuzz knob to be very responsive on this Mooer pedal, which is something I really like about it. Turn the volume up after 12 and the fuzz around 1.4 way for a light and smooth overdrive/distortion sound turndTurn the fuzz up and you start getting into warm, creamy and fuzzy territory that you've come to expect for a fuzz face type pedal. When the fuzz is maxed out, things start to sound pretty lo-fi but in a really good way. The pedal overall is super responsive too, so you can roll back the volume and it cleans up really nicely. One of the best descriptions I read about this pedal went something along the lines of, fuzzy on the outside and warm on the inside. This is such an accurate description of this Mooer fuzz pedal. Mooer Audio Grey Faze Fuzz Vs Dunlop Germanium Fuzz FaceThe Grey Faze is a really decent clone of the Dunlop Germanium fuzz face. I've tried a lot of budget and cheaper fuzz pedals that all land up sounding too fizzy for my liking. This is not the case with the grey faze. As I like the sound of this pedal a lot. And, despite it only having two controls, I find it to be pretty versatile. That is thanks to the fact that the actual "Fuzz" knob on this pedal is super responsive. And by adjusting it, you're able to achieve a wide array of sounds. One thing I do find a little annoying with the Grey Faze is that the volume has to always be set above 12 O'clock. Anything below and It feels the pedal starts to lose signal. Something that does not occur with the Dunlop Fuzz Face. Having said that, I'd most likely opt for the Mooer pedal, due to the fact that it's more affordable, is smaller in size and sounds pretty spot on the original. Mooer Grey Faze vs Blue FazeIf you're wondering how this matches up to the Blue Faze which is another similar fuzz on this Mooer clone list, I'll explain..the Blue faze vs the Grey faze is pretty simple. Both are pedals based on the same Fuzz face circuit. However, the Blue Faze uses silicon transistors whilst the Grey faze uses germanium transistors. This results in a different tone from the either pedal. The Blue Faze is a lot brasher an in your face. Whilst the grey faze is warmer and smoother overall. Also, the grey faze can, at times, sound like overdrive. Mooer Hustle Drive Review: Overdrive & Distortion Pedal
If there color, layout, and font weren't enough of a giveaway, I can surely tell you that the Mooer Hustle Drive is a clone of the OCD overdrive pedal by OCD. In my opinion, the Hustle Drive by Mooer Pedals is not quite as good as the original OCD Pedal, but I'll get into that a little further down. Before I do so, I think it is important to give some background to the OCD pedal first. It needs to be noted, that the OCD by Fulltone actually has 7 different version. And, each version has their own unique characteristics. With the latest version even having a completely different circuit board to the rest. So, to say that the Mooer Hustle Drive is a clone of the OCD is a little vague. Due to the fact that there is no specific reference to the version of OCD it is cloned after. Hustle Drive Sound?Having said that, the Hustle Drive by Mooer does maintain the general character and qualities of the OCD range of pedals. The Hustle Drive, like the OCD, reproduces the sound of overdrive that would come from a tube amp. The Hustle Drive is also laid out in the same fashion, with the same three knobs as the original (tone, volume, gain). As well as the 2-way toggle switch featured on the original OCD. Which, lets you select between HighPeak and Low Peak. Toggling between these two changes the way in which the pedal works and sounds:
Mooer Hustle Drive Vs OCD FulltoneThe Hustle Drive gets close to the sound of the OCD. But, it does not do the best job of being a clone. For example, Joyo makes a better clone of the OCD in the form of the Ultimate Drive. Mooer's Hustle Drive gets about 85-90% close to OCD but lacks some important tonal characteristics. The actual OCD sounds more like a real tube amp to me. It also sounds more alive when compared to the Hustle Drive. The OCD is also a bit more bright whilst the Hustle Drive seems to compress more. And thus, sounds slightly darker. Furthermore, the OCD seems to have a lot more headroom and dynamic in sound as well as the way it responds. I go really in-depth on my OCD pedal comparison here. Mooer LoFi Machine Review: Sample Reducing Effects Pedal
There are a few pedals on the Mooer clone list that are not clones of other pedals. The LoFi Machine happens to be one of these Mooer pedals. If you're wanting a guitar pedal that can achieve the Super Mario theme song sound (and more), then this LoFi Machine is definitely for you. But what is the LoFi machine? it is a pedal that reduces the sample rate and depth, with a range from 60Hz all the way up to 31250Hz And, 5bit all the up to 16 bits parameter for controlling the depth of the sample... Thus, resulting bit-crusher type of sound. The LoFi Machine has three knobs along with a 3-way toggle switch. The three knobs on this pedal include:
LoFi Machine Bass?Along with these three knobs, the LoFi machine has, as I mentioned above, a 3-way toggle switch. The toggles include Bass, guitar, and synth. Now I'm sure your first assumption, like mine was, is to think that this toggle switch changes the sound of the pedal to that of the instrument of either bass, guitar or synth. However, we'd be wrong in thinking this. That is because this toggle was rather designed to optimize the pedal for the instrument that is being used. For example, if you're a bassist, you'd have the toggle on bass mode. If you're running a synth through it, you'd have it on synth mode. And, if you're playing the guitar through it, you'd have it on guitar mode. So you can see here that this toggle doesn't actually change the sound at all. Conclusion on the MSE1 Sample Reducing PedalDo you need this pedal? This is an exceptionally hard Mooer pedal to review. Due to the fact that, in my opinion, does not serve much of a purpose on the average pedal board. This is not an essential effect. Unless of course, you've written a song/part with this pedal. Or, you're trying to recreate a particular sound that this pedal can produce. Other than those two reasons, it is quite hard to recommend this pedal for any specific need. Unless of course, you need a guitar pedal for super Mario sound. Mooer Micro ABY Review: MKII
Okay, where to begin. So, the Mooer Micro ABY is a clone of the EHX Switchblade. Or, I should rather say that it WAS a clone of the Switchblade. You see, Mooer doesn't produce the first version of the Micro ABY. Instead, they stopped making the Micro ABY and released a Micro ABY MK11. The Micro ABY Mk11 is pretty much an identical copy of the Fender Micro ABY switch. In fact, it's the exact same pedal, only it is branded as Mooer instead of Fender. I am not joking here when I say they are the exact same pedal. However, this should not put you off the Mooer pedal. In fact, it should be a testament to the quality of this ABY pedal. because, if Fender is willing to brand it too, then you know it must be good, right? Alas, the Mooer Micro ABY MKII has a channel switch. Which is laid out as follows:
I'd love to be able to explain the ins and outs of how this ABY by Mooer pedals works. However, I have very little knowledge and experience using this pedal, and ABY pedals in general. It is more of a utilitarian pedal as opposed to an effects pedal. I hope to gain some experience in the near future with this Mooer pedal and update this section accordingly when I have. Mooer Ninety Orange Review: Phaser Pedal
Mooer's Ninety Orange is indeed a clone of the MXR Phase 90. However, Mooer once again has taken it further by not only giving you one but essentially two clones of classic MXR phase pedals, into one tiny and compact Mooer pedal. This made my list for best guitar pedals under $50 as I think it is a really good copy and value for money. This pedal comes with the familiar, one-knob phaser configuration, that we're used to seeing from the MXR Phase 90. However, the Mooer 90 added an extra toggle switch which lets you flick between two different voices. These phaser voicings include:
Ninety Orange MPH1 vs MXR Phase 90This is a very simple yet effective phaser pedal. It also sounds good and can definitely be compared to the MXR's Phase 90 in terms of the way it sounds. I'd much rather buy the Mooer Ninety orange instead of the actual MXR. The reason is simple. You get a great sounding phaser pedal with two voicing in a compact pedal for an affordable price. But, if I must be honest, If someone gave me the opportunity to trade in the Mooer for an actual 1974 script phase, I'd take it. Only because they were, and still are such sought-after phaser pedals. Mooer Pitch Box Review: Micro Pitch Shifter Effects Pedal
Apparently, the Pitch Box by Mooer pedals is a clone of the Boss PS-5 Super Shifter. I somehow don't think that this Mooer pedal is actually a clone of the PS-5. That is not to say that it didn't draw inspiration from the Boss. In fact, it is quite obvious to see that this Mooer pedal is based, loosely, on the PS-5, but is certainly no clone. The Boss also has a lot more features when compared to the Pitch Box. The Mooer has plenty of features too, especially for a small pedal. However, I'll explain how this pedal works further down below. Although there are some differences, and, since we've established that it's not an exact clone, I'd still recommend this Mooer Pitch Box for the guitarist on a budget needing a simple, yet effect pitch shifter pedal. Mooer Pitch Box vs Boss PS-5 Super Shifter
The difference between these two pedals is that the Boss has a completely different layout. The Mooer Pitch Box has one knob which controls the Pitch. Along with a 3-way toggle switch which does actually maintain some of the same modes as found on the Boss PS-5. Such as Harmony, Pitch Shift, and Detune mode. Whereas the Boss PS-5 has essentially 4 knobs (5 if you want to get technical) which include: Balance knob, Key selection knob, Pitch knob, and a mode selector knob which allows the choice between5 different modes including harmonist, pitch shift, detune, T. Arm and flutter. MOOER PITCH BOX MANUAL Mooer Pure Boost Review: Boost Pedal
This list, as I have already mentioned, features two clones of Xotic effects Booster pedals. First being the flex boost and second is this one. The Pure Boost. The Xotic pedals are known to be pretty expensive. So if you are after that pedal on a budget. Then, the Mooer Audio is a great option for you. This pedal is a clean boost first and foremost. Whilst this is a transparent pedal, there are volume, bass, treble and gain controls which allow you to expand the sound that this pedal produces. It offers up to 20 decibels of boost and a further 15 decibels of treble and bass equalization. Pure Boost vs RC BoosterThe pedal compares well but not spot on exactly. It certainly does an incredible job of providing a clean and transparent boost with the ability to add the drive as well as the bass to fatten up the sound. But, the RC Booster is expensive for a reason. And that reason is that you really get one of the smoothest sounding boost pedals around. The Pure Boost can get a bit noisy. But is still a great pedal especially considering the price and size. Pure Octave Review: Octave Guitar Effects Pedal
I'll start off by saying that I don't believe this is a clone of any pedal. Let alone the Boss. However, many people seem to believe it is so I will succumb to saying it is at the very least inspired by the boss octave pedals. This pedal shifts the pitch of the sound and allows for the mixing of both the high octaves as well as the sub-octaves alongside your dry guitar sound. This gives you an almost POG-like sound in terms of the way it reacts. Furthermore, it can deliver organ sounds if you tweak it correctly. Mooer Pure Octave Vs POGAt first glance, this MOC1 effects pedal looks very complicated. However, it is in fact quite simple to grasp. To start with, there are eleven different modes for the various octaves. With each different mode, you're able to adjust, add and blend the low and high octaves to your taste. You can also control your original signal so if you want none of it you can take it away. If you only want a subtle octave, you can retain most of your original sound. This is a great pedal that I can't say enough about. The only issue I have is with the polyphonic notes. So when strumming chords don't always produce the best sound as a POG would. Having said that, it is great and I love this pedal. Rage Machine Review: Metal Distortion
Looking to get extreme with your tone? Like death metal extreme. Then this Rage Machine distortion pedal will definitely do the job for you. Despite the tiny size, this pedal produces one of the largest sounds out of all the pedals in this range. The pedal features four separate controls. The level knob controls the volume. The Low and High knobs control their respective bass and treble EQ. And finally, the "rage" knob refers to the distortion control. Rage Machine Clone Vs Digitech Death MetalThe general consensus is that this pedal is a clone of the Digitech death metal pedal. I have actually owned the Digitech pedal and I can definitely say that the Rage machine is very similar. However, it was brought to my attention that the Rage machine might actually be a clone of the Rage Master which is also made by Digitech. To be honest, that would actually make sense. Considering the name of this Mooer pedal. Watch this space for an update on this pedal. Reecho Review: Digital Delay Pedal by Mooer Audio
This is quite a confusing pedal. It's awesome, just quite confusing. This is what I mean... It is a digital delay pedal that produces analog delay sounds (see what I mean). But, it achieves the analog sounds so well in my opinion. This pedal has a three-way toggle switch. This lets you toggle between analog, tape echo and reel echo. These are all "vintage delay" effects which used to require massive units to get the sound. Now Mooer offers these effects in a tiny unit. Furthermore, a Time, Feedback and Level knob are added to the pedal for further sound expansion. Mooer Reecho Pro vs Boss DD-2I must be honest, I am not sure if this is a clone of the Boss at all. I know that the Boss DD-2 has been discontinued for quite some time now. so it is quite hard for me to do a test or to find a comparison between the two pedals. Let me know in the comments below if you have any info regarding this. Also, I reckon the Boss DD7 is an all in one solution for a delay pedal in stomp box form. Repeater Review: Digital Delay Pedal
There are quite a lot of delay pedals on this list by Mooer audio. However, the different delay pedals are quite unique from each other. The repeater is another digital delay pedal. This one includes a three-way toggle switch that lets you choose between three different delay types. The first mode is "normal". This mode delivers a delay sounds that only repeats what is actually played. Where this would be useful is for quick guitar parts such as fast heavy metal riffs. Whereby clear repetition of dealy is needed. The second mode is called "kill dry". This mode "kills" the original signal and only delivers the repetition. Where this would be useful is when your effects chain is in a parallel set up. And finally, the "mod" mode refers to modulation. Which, provides a unique delay sound mixed with some chorus which will allow for the epic creation of soundscapes. Mooer Repeater Vs. Line 6 EcholizerMany believe this pedal to be a clone of the Line 6 Echoliser pedal. However, whilst there are definitely some similarities between the two, The line 6offers may more options including tap tempo. Which, unfortunately, the Repeater does not have. The Mooer only packs a fraction of these sound options and for that reason, I cannot safely call this an exact clone. Rumble Drive Review: Overdrive Pedal
This is one of my favorite pedal in this range. It is the Rumble drive and apparently, is based on the famous and expensive "Zen Drive" pedal. However, I have my reservations about that. Having said that, the Rumble is a very responsive and dynamic pedal. What this means is that it reacts to the way in which you play., So if you play harder, it will respond differently to if you were to play softer. Ruble Drive Clone vs ZendriveThis is a very similar characteristic of the Zen drive. The Rumble is also a very mid-focused overdrive pedal. And, in my opinion, tends to sound more like the Dumble amplifiers. Which would make sense considering the name of this pedal. If you're looking for a lot of gain on tap, then this is not the pedal for you. However, for a blues tone, this is a very useful and handy pedal that will be all you need. Shimverb Review: Reverb Pedal
The Mooer Shimverb is a reverb pedal that has three options. The main feature to sway someone to get this pedal over other reverbs is because of the Shimmer function. The affordable reverb pedal allows you to toggle between three different reverbs. The first two are your standard room and spring reverb. The third is, as mentioned, the shimmer. This is Mooer's unique verb sound which allows one to create soundscapes and dreamy shoegazing guitar parts. Think along the lines of post-punk and guitar-based indie music from the 1980s. Even if you ignore the shimmer function, the simple spring or room reverb that comes from this pedal is great. If you're in need of reverb at an affordable price, this is a fantastic option. Mooer Slow Engine Review
In the 1980s Boss released a now legendary pedal in the form of the slow gear. Since then it has built up a very decent niche following. However, the pedal has been discontinued for quite some time. And, as a result, the second-hand prices for these units have skyrocketed to unreasonable amounts. Especially considering what the pedal does. Luckily, Mooer now makes a very sufficient clone of this classic pedal. The pedal itself is used to create volume swells of different types. More specifically, this can be used to achieve that violin-like tone that would otherwise require you to precisely ride your volume knob which is not always possible. This pedal relives us from having to do this. Out of all the pedals, I find this one of the hardest to describe. For that reason, check out the video below to see what it can do. It is a very simple pedal with only two knobs. The first knob controls the attack whilst the second knob allows for the adjustment of the sensitivity. Once again, this is better demonstrated in the video. Mooer Solo Distortion Review
If you're a lead guitarist then this is one of those essential distortion pedals you need on your board. The Original Riot distortion by Suhr would be the first choice. However, these are expensive and big. The Mooer is much cheaper and smaller and delivers the same features and similar sound as the Suhr does. The Solo has 3 different modes which can be activated by a toggle switch. These include:
Mooer Solo vs Suhr RiotThis is a fantastic pedal which can achieve a lot in terms of different tones and is a necessary tool for any rock lead guitarists. I think this pedal does a great job in cloning the original and I highly recommend it for anyone who is unsure. Mooer Bass Sweeper Review: Dynamic Envelope Filter Pedal
If you want to add the funk yo your bass lines then this is the pedal for you. It is first and foremost a bass filter pedal. However, it can be used on both regular guitar as well as bass. In a nutshell, this is an automatic wah-wah type of effect. But, it is definitely more than that. It is the perfect pedal to add some spice to your bass sound and rig. A two-way toggle lets you flick between clean or fuzz modes. The clean is your regular mode whilst the fuzz, well it adds fuzz to your signal. Sweeper Vs EHX BaseballsThe sweeper is without a doubt inspired by and based on the EHX bassballs. However, it is not an identical clone. The EHX features only a "distortion" toggle and a resonance knob. Whilst the Mooer allows you to control the intensity, range, and resonance. So on paper, the Mooer has more features and should be the better choice. Mooer Thunderball Review: Bass Fuzz
Whilst this is considered to be a fuzz pedal. I'd say it is both fuzz and a distortion for bass in one. This pedal lets you go from subtle drive all the way up to high gain. It features a two-way selector knob which lets you opt between fuzz or distortion. The distortion channel misses the fuzz and the dry signal for a tone with more definition. The Fuzz setting is your straight up fuzz setting. It has a tone, gain and volume knob. A good tip with this pedal is that you can use the volume knob as a boost function. However, this only works in fuzz mode and not distortion. Lastly, it is believed that this pedal is a clone on the Electro-Harmonix Bass blogger pedal. Mooer Trelicopter Review: Optical Tremolo Pedal
The Trelicopter is a really good optical trem effects pedal for those on a tight budget. For such a small enclosure, you're able to get quite a diverse range of tremolo sounds. I must point out that this is not your "regular" trem pedal. I find it to be a bit more far out and shoegazy if that makes sense. A fantastic pedal for post-punk and indie guitar-based music. Mooer Trelicopter Volume DropThis guitar pedal has three knobs which include depth, bias, and speed. Each knob does the following to the sound of the tremolo:
As far as the volume drop is concerned. I have not experienced this "fault" unless of course, the internet is referring to the fact that this pedal produces a volume-drop type of effects. In which case, it definitely does. Trelicopter Vs Demeter TremulatorThe Demeter Tremulator is an expensive pedal. Having said that, it sounds great and is a truly unique effect. It is also quite a hard pedal to come by. So for that reason, it is wonderful that Mooer Audio has recreated this type of optical tremolo pedal based as a clone of the Demeter Tremulator. Mooer Triangle Buff Review: Fuzz Pedal
This is a classic fuzz pedal through and through. It sounds incredibly full and has a lot of sustain in tap. Also, I find it one of the best fuzz pedals for lead guitar out of this Mooer clone list. Furthermore, it works well on both single coils and humbuckers. Which is often rare in a fuzz pedal. As they generally suit single coils more than humbucker pickups. Depending on how you tweak this pedal, you can get a really thick tone. A little tip I learned is that by turning the sustain knob clockwise, you make the pedal sound brighter. So you can turn the tone anti-clockwise to your taste. Triangle Buff vs Big MuffThis is indeed a clone of the Big Muff by Electro-Harmonix. All of the characteristics mentioned above about the Mooer. Are those typical tonal characteristics of a class Big Muff. We all know the original muff to be an exceptionally large pedal. And, one this is not pedalboard friendly. For that reason, the Triangle Buff is a good choice as it is quite literally a fraction of the size of a proper Big Muff Fuzz. Mooer Ultra Drive Review MKII: Distortion Pedal
This pedal is based the classic and world-famous, Boss DS-1. However, it is a clone with a twist. This is in actual fact, based on the DS-1 with the Keeley Modification. The Mooer, like the Keeley, modded DS-1 comes with a three-way toggle switch. The Keeley doesn't say what each toggle does. But, the Mooer outlines them as follows:
The pedal also has a further level, tone and distortion knobs. Making it a nice and diverse pedal that can cover a lot of ground when it comes to an array of distortion tones. Mooer Audio Yellow Comp Review: Clone
This is an optical compressor pedal. It is able to produce a nice natural decay along with a smooth compression sound. For me, this is one of the nicest sounding compressor pedals on the market. Forget about the fact that it is a cheaper pedal, it still fares very well on the compressor pedal market. This optical compressor guitar effects pedal shines best when paired with a single coil pickup. My favorite guitar is the Stratocaster with this pedal as well as my P90 Gibson Junior. Having said that, it can definitely work wonders on humbuckers too. Which, I have also tried on my Les Paul. Yellow Comp vs Diamond Compressor.The Diamond compressor is a big yellow pedal. Therefore it is pretty obvious that the name, "yellow comp" means it is a clone of the Diamond. The diamond is an amazing pedal/. However, it is quite pricey. And, relatively hard to come by. I believe that the Diamond comp is easily beaten by the sound of the Nova Comp by T-Rex. It is my favorite compressor pedal ever so perhaps I am a little biased. Rounding Up My Mooer Pedals ReviewSo all in all Mooer do a really good job at cloning some pretty classic pedals. To be honest, not all of them are exact clones. But, for affordable pedals, pretty much all of them are decent enough to justify buying. Many of which, will surprise you and become permanent fixtures on your pedalboard like with me. I just wanted to address two other elements regarding these mini micro pedals. No Battery Only Power SupplySo none of the pedals are able to be powered up using a 9V battery. Instead, they are powered using your regular pedal power supply. Check out my article on pedalboard power supplies for more info on this. Mooer's Patch CablesThe Mooer company have also provided a range of patch cables specifically designed for these pedals. They're essentially couples instead of patch cables. But if you'd like to read more on this, check the post about Guitar patch cables. If you enjoyed this article, view more of my pedal reviews here. The post Mooer Clone List And Pedals Review appeared first on Guitar Pick Zone. via Guitar Pick Zone http://guitarpickzone.com/mooer-clone-list-and-pedals-review/ 
Not quite what I meant by “Naked”! When last did you play your guitar naked? Don’t worry – naked guitar playing is not quite what you are probably thinking it is (anyway, if you take little things like trem cavities and springs into account, you’ll realise that type of naked playing is not necessarily something you want to try). No… by “naked” I’m referring to playing with as little between you and your audience as possible, stripping away anything other than the basics: an unplugged acoustic guitar or an electric guitar, cable and amp. The most important thing about playing naked is it is a great way to improve your playing. Effects on an electric guitar or even the simple volume boost of plugging an electro-acoustic into a PA all add things to the sound of the guitar and alter it. Unfortunately these things also often mask or distract you from hearing other aspects of your playing – usually the finer points of things like pitch, timing, articulation and dynamics. Think about it – how can you practice properly when you can’t hear these things? Or simply don’t hear them because you’re too busy experiencing other aspects of the sound? Also, music and guitar are primarily about performing and entertaining for an audience, whether the audience in question be thousands at a concert or one single person sitting next to them on the couch. The acid test for any performing musician is being able to entertain an audience with nothing but their instrument (and maybe their voice). Could you carry on and pull off a gig if you forget your effects pedals at home? Can you entertain people with nothing but an acoustic guitar the next time power companies decides to justify higher power rates by cutting off the power? So in a way, playing naked is also a kind of disaster preparedness. Spending some time each week playing naked will make you a better and more versatile player. You’ll probably also find that you start sounding better, even when plugged in with effects and/or playing at high volume through an amp. The post Naked Guitar Playing appeared first on Guitar Pick Zone. via Guitar Pick Zone http://guitarpickzone.com/naked-guitar-playing/
The Boss DD-7 Digital Delay Pedal is a new and updated version of one of the most popular digital delays on the market. Offering more new features and a longer delay time than its predecessor, the Boss DD-7 is a great option for musicians and audio specialists who are interested in guitar effects pedals and producing top-quality audio tracks. Boss DD-7 SpecsThe Boss DD-7 offers delay options from 1ms to 6400ms and a maximum recording time of up to 40 seconds while in hold mode. The delay pedal offers a nominal input and output level of -20 dBu, along with an input impedance of 1 M ohm and an output impedance 1 k ohm. In size, the Boss DD-7 Digital Delay Pedal weighs approximately 1.2 pounds and has the dimensions of 8 by 10 by 8 inches. The ImprovementsThe Boss DD-7 Digital Delay Pedal offers up to 6.4 seconds of delay time and comes with two new delay modes, the Analog Delay and the Modulation Delay. With the Analog Delay, users receive a modeled simulation of the BOSS DM2′s classic effects, and with the Modulation Delay, users can produce chorus-flavored sounds with the Boss DD-7 Digital Delay Pedal. Additionally, the delay pedal can also create many different and innovative effects by using the Boss DD-7′s stereo output, such as studio sweeps made through stereo panning. Boss DD-7 Pros and ConsThe Boss DD-7 Digital Delay Pedal comes with hands-free control, making it more helpful and advantageous for musicians using the product. However, the external foot-switch and Expression pedal that allow hands-free control are sold separately from the actual Boss DD-7. However, if consumers are willing to shell out the extra money to pick up these two products, they can control tap tempo from the external foot-switch and delay time, effect levels and feedback – which is great on stage. Customer ThoughtOne great feature that consumers are excited about is the ability of the Boss DD-7 to continue sound without break, even as the delay is turned off and the instrument continuing to play. However, when it comes to specifics, complaints have arisen about the fact that when the Boss DD-7 is on hold for recording, the delay cannot be used at the same time, limiting the product’s use in some situations. The post Boss DD7 Digital Delay Review appeared first on Guitar Pick Zone. via Guitar Pick Zone http://guitarpickzone.com/boss-dd7-digital-delay-review/
|
ABOUT USGuitar Pick Zone is your number 1 website for everything guitar pick and plectrum related. We discuss the best guitar picks, the cool guitar picks. We even discuss expensive acoustic guitars and the Fender Telecaster body ArchivesNo Archives Categories |
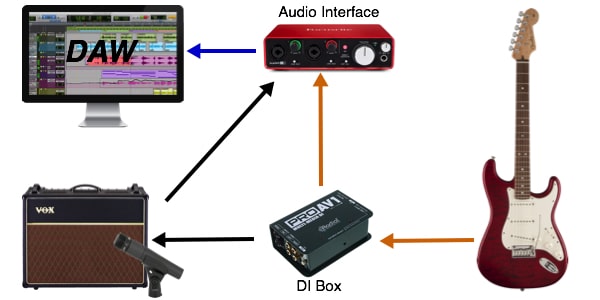
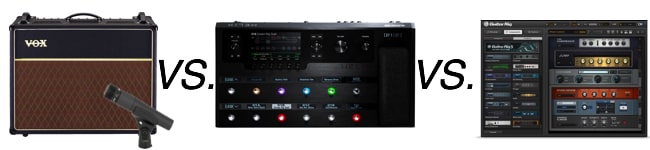
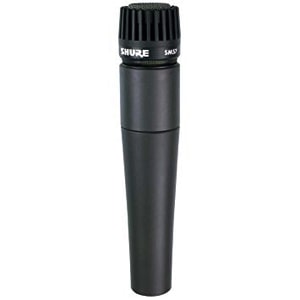
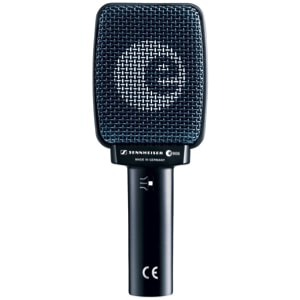
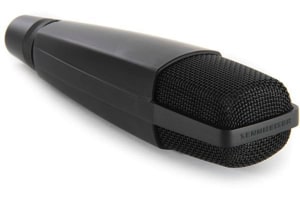


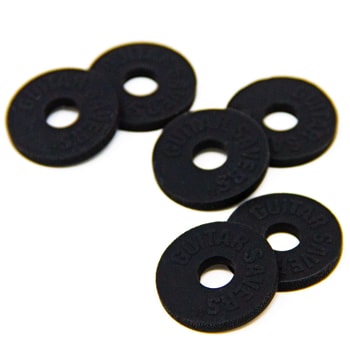
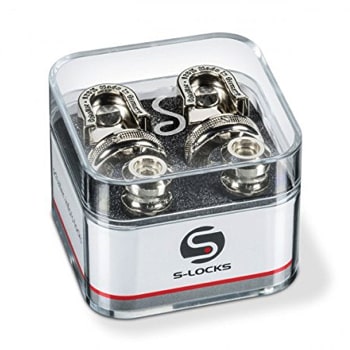
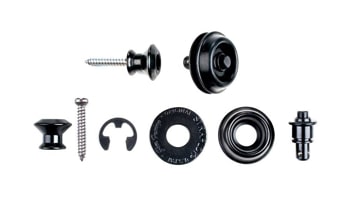
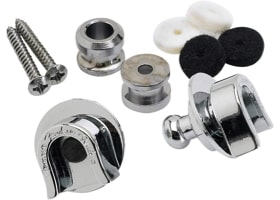


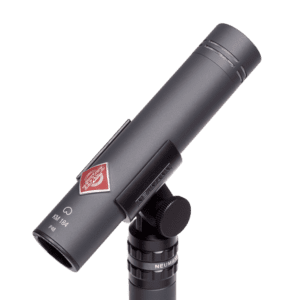
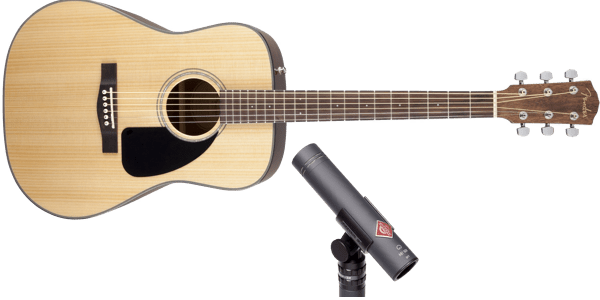

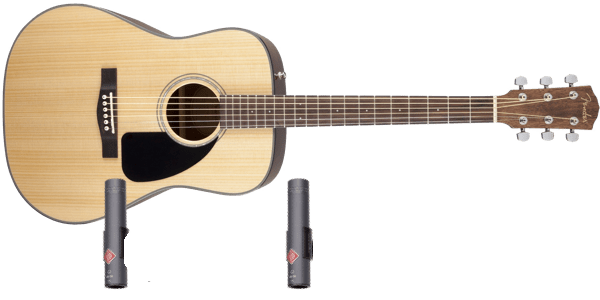
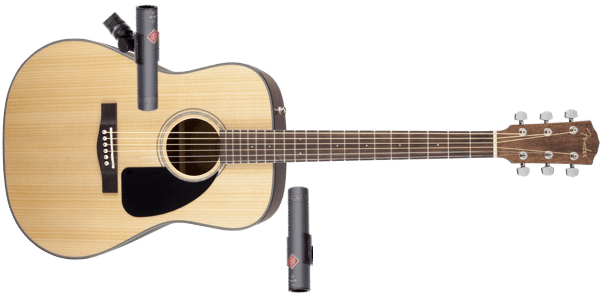


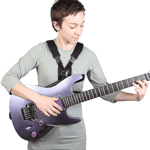
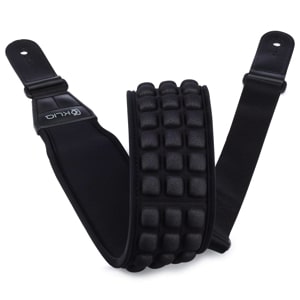
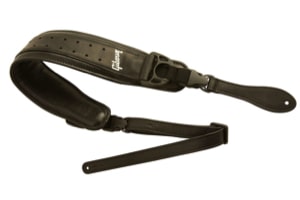

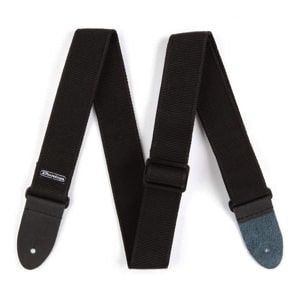


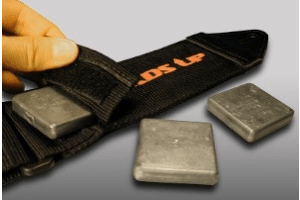


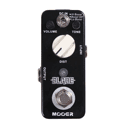

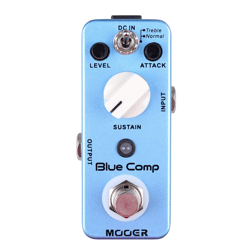
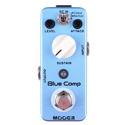
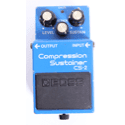
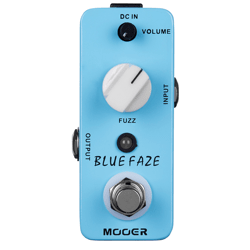


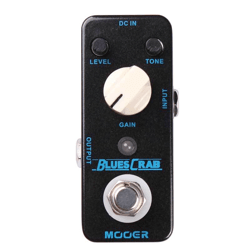

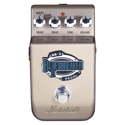


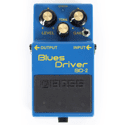


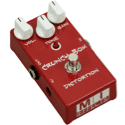


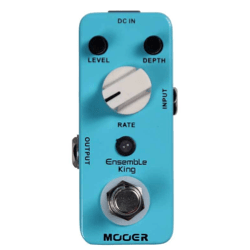


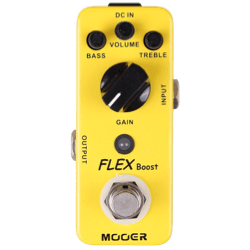
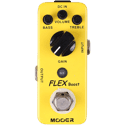
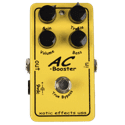


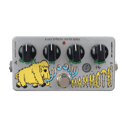

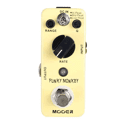


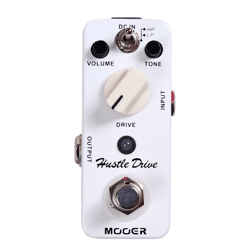
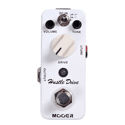
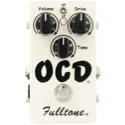


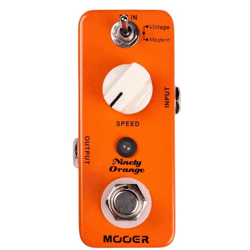

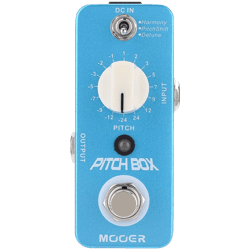
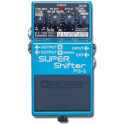
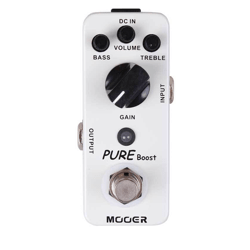

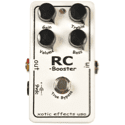


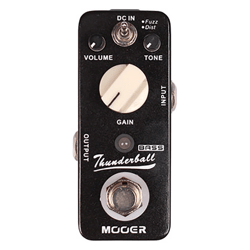

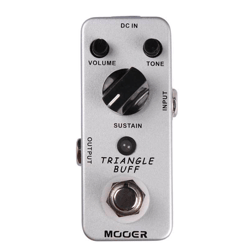
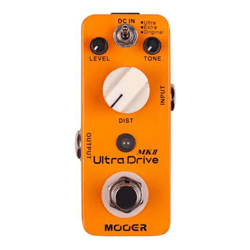

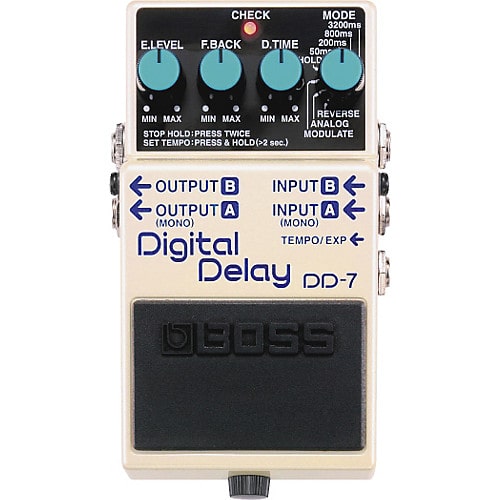
 My Fender 65 Princeton Reverb Reissue Review
 While this amp is “only” 15 watts, it’s still surprisingly loud when turned up and isn’t for late night cranked playing at home unless you have very understanding neighbours. Unfortunately it’s not quite loud enough to stay clean at gig volumes or hang with a loud drummer by itself – for that, the Princeton’s bigger brother the Deluxe Reverb is ideal. But if you want to keep stage volumes down and mic up for the extra coverage, the Princeton will do the job admirably.
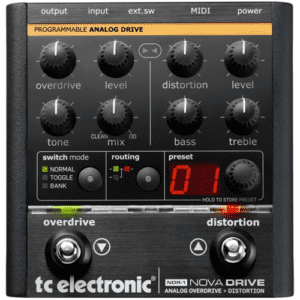 My short, yet sweet, TC Electronic Nova Drive review.
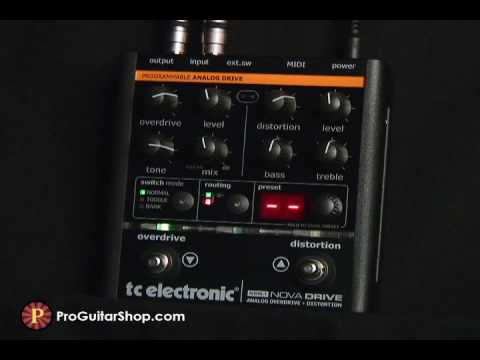
 RSS Feed
